KAVAN R8 - User manual
Introduction
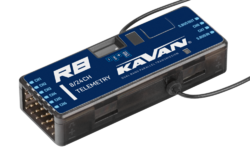
Congratulations on your purchase of the KAVAN R8 advanced 8-channel telemetry receiver. It operates on a 2.4GHz simultaneous dual-frequency transmission system Twin 2.4GHz. It has 8 high-precision PWM channels and 16 or 24-channel modes using S.BUS. Two detachable antennas with IPEX4 connectors provide full signal strength over a range of up to tens of kilometres. It is especially ideal for gliders, but you can also use it for other various models. With redundancy support, it can be connected as a primary receiver via S.BUS. With the Twin 2.4GHz protocol, both receivers work fully simultaneously in this connection. Thanks to the F.BUS connection option, you can also pair it quickly and easily to several different telemetry devices, providing bidirectional data transmission via a single cable.
It features advanced interference suppression for reliable, stable signal transmission across the entire range. Smart transmission system matching speeds up pairing. The black box function stores essential flight data. Receiver operating statuses are indicated by an LED indicator. Smart pairing allows firmware updates wirelessly.
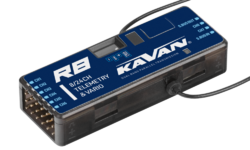
It is also available in a variometer-equipped version, which provides more accurate and faster measurement and transmission of altitude and vertical speed data. It also allows instant audio feedback from the variometer for Twin 2.4GHz transmitters.
If you have any questions about the R8 receiver and its operation, please contact the technical and service staff of KAVAN Europe s.r.o. by e-mail (info@kavanrc.com for general technical information, servis@kavanrc.com for service) or by phone (+420 466 260 133 for general technical information, +420 463 358 700 for service), during working hours 8am–16pm, Monday to Friday).
 |
 |
| KAV18.10008 KAVAN R8 | KAV18.10008V KAVAN R8 Vario |
Firmware
Download the firmware:
- R8/GR8 version 3.0.2
- R8/GR8 version 3.0.1
- R8/GR8 version 3.0.0
- R8/GR8 version 1.0.9
- R8/GR8 version 1.0.8
Technical specifications
- RF transmission: Twin 2.4 GHz
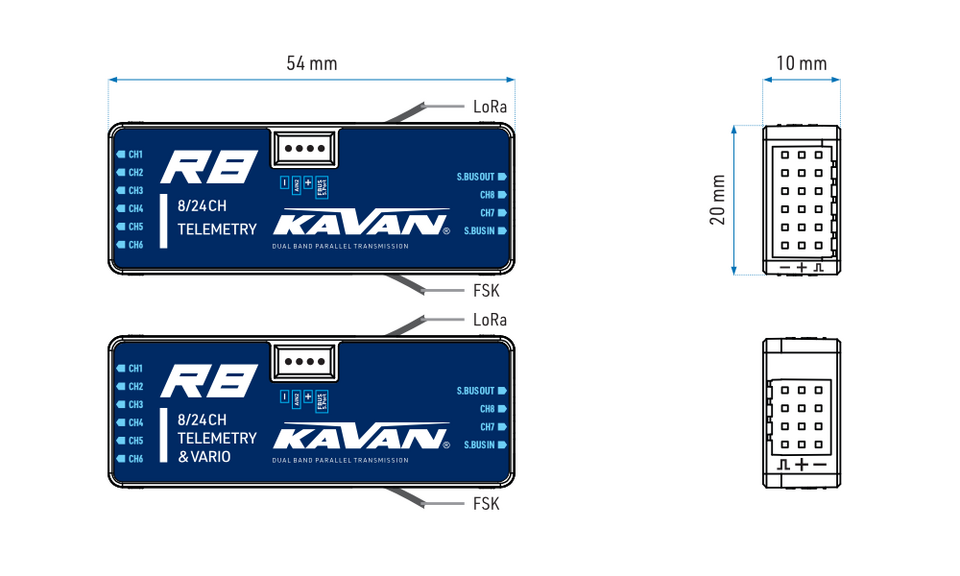
- Dimensions: 54×20×10 mm (L*W*H)
- Weight: 9.8 g
- Operating voltage: 3.5–10 V (supply voltage min. 2.8 V)
- Operating current: 80 mA at 5 V
- Vario - vertical speed measurement range: ±10 m/s
- Vario - altimeter range and resolution: -700 m to 10.000 m, 0.1 m
- External voltage measurement range via AIN2: 0–35 V
- Antenna connector: IPEX4
- Compatibility: Twin 2.4 GHz
- Max. radiated power: < 20 dBm
- Operating frequency: 2.400–2.4835 GHz

Functions
- Increased protection against RF interference and more stable RF transmission
- Simultaneous dual-frequency Twin 2.4GHz transmission system with smart pairing
- Black box feature
- High maximum operating range
- Wireless firmware updates (OTA)
- 8 high-precision PWM channels
- S.BUS output port with 16/24 channel mode)
- S.BUS input port (with support for redundant connection of 2 receivers)
- F.BUS / S.Port
Status light
| Green | Red | Status |
|---|---|---|
| On | On | Registering |
| Blinking | Blinking | Registration complete |
| On | On | Pairing |
| On | Off | Pairing complete |
| On | Off | Working properly |
| Off | On | Fail-safe mode |
Registration and pairing
Before using your receiver you must first register it.
Procedure:
- Start the registration process by selecting [Register].
- A window will appear with the message "Waiting...." with a repeating voice message "Register".
- Hold down the pairing button on the receiver and switch it on. Wait for the red and green LEDs to light up. The RID and UID can be set at this stage:
- RID: This is the unique identifier of the transmitter. It can be changed to the same/own code to use the Smart share feature for model sharing (if you want to share models and own multiple transmitters, or if you share models with other modellers, you must have the same RID set on those transmitters). The RID is the transmitter data (Owner Registration ID) written into the receiver's memory. If two transmitters have the same RID, you can easily share models including receivers between them using the Smart share function.
- RX name: the naming of the receiver is done automatically when the receiver is paired for the first time. This name can be changed at any time. This is useful when using more than one receiver, e.g. to remember the settings of the receivers, e.g. RX4R1 is for CH1-8 or RX4R2 is for CH9-16 or RX4R3 is for CH17-24.
- UID: is used to distinguish multiple receivers used simultaneously in one model. A default value of 0 can be left for a single receiver. If more than one receiver is to be used in one model, the UID must be changed, usually 0 for CH1-8, 1 for CH9-16 and 2 for CH17-24. Note that this UID cannot be read back from the receiver, so it is a good idea to tag the receiver.
- Press the [Register] button to complete the settings. The "Registration OK" dialog box will appear. Press the [OK] button to continue.
- Turn off the receiver. This registers the receiver. However, you still need to pair it with the transmitter to use it.
Pairing
Receiver pairing allows a receiver registered in phase 1 to be paired with one of the transmitters. After that, the receiver will only communicate with that transmitter unless you pair it with another transmitter. Before using the transmitter for the first time, you must check the range of the transmitter!
- Turn off the power to the receiver.
- RX 1 [Pairing]: Select [Pairing] to start the pairing process. Every few seconds, a "Pairing" voice alert will sound to confirm that you are in pairing mode. A pop-up window will display the message " Waiting for receiver...".
- Switch on the receiver without holding the F/S pairing button. A window will appear with the message "Selecting Device" and the name of the receiver you have just switched on.
- Scroll to the receiver name and select it. A window will appear with a message that the pairing was successful.
- Turn off the transmitter and receiver.
- Switch on the transmitter and then the receiver. If the green LED on the receiver is lit and the red LED is not lit, the receiver is connected to the transmitter. The pairing of the receiver and transmitter will not need to be repeated unless one is replaced.
- The receiver will only be controlled by the transmitter it is paired to. Other transmitters in its vicinity do not affect its function.
- The name of the selected RX1 receiver will now be displayed next to it.
- The receiver is now ready for use.
- If redundant wiring is required, repeat for receivers 2 and 3.
Video tutorial
If you're still having problems with registration and pairing, please follow our video tutorial showing an alternative more straightforward method.
How to set up telemetry altitude data
- Pair the receiver with the built-in variometer sensor to the transmitter.
- In the menu MODEL → TELEMETRY select search for new sensors.
- The new sensor is found and the [Altitude] should still flash in the list.
- Hold down the [Altitude] line to bring up the [Edit] menu.
- Now the telemetry data such as [Range] and [Units] of the variometer can be set.
How to switch S.Port/F.Port/FBUS
VF system → RX1 line → [Set]
The body. Port → expand menu and select S.Port/F.Port/FBUS
How to switch SBUS channel mode
VF system → RX1 line → [Set]
SBUS → expand menu and select SBUS-16/SBUS-24
OTA ("Over The Air") firmware updates
Go to [File Manager] and select FW, press enter button, select [Flash RX by int.OTA]. Power on the receiver, select RX, confirm by pressing [ENTER], complete the flash process and [Success] will be displayed on the transmitter.
Wait 3 seconds, the receiver is working properly at this time.
Update the firmware after the receiver is registered (OTA).
Range check
A range check should be made before each flight in case loss of signal is caused by reflection from metal or concrete structures and shadowing of the signal by buildings or trees during flight.
- Place the model at least 60 cm on a non-metallic base (e.g. on a wooden bench). The receiving antenna should be in a vertical position.
- Enter the ETHOS system, go to "VF system", select the "RANGE" mode and press [ENTER]. In the range check mode, the effective range is reduced to 1/30.
Fail-safe emergency rates
After enabling Fail-safe, there are 3 modes available: No signal, Hold, Custom.
No signal: When the signal is lost, the receiver does not send a control signal to the deflectors on any channel. To use this type, select it from the menu and wait 9 seconds for the Fail-safe setting change to take effect.
Hold: The receiver maintains the deflections as they were before the signal was lost. To use this type, select it from the menu and wait 9 seconds for the Fail-safe setting change to take effect.
Custom: The receiver maintains the deflection value on all channels as you pre-select it. Select the Fail-safe setting menu. Switch from Disconnect/Hold/Not set to "Custom". Select the channel for which you want to set fail-safe deflections and confirm the selection. Then set the deflections on each desired channel and confirm the selection. Wait 9 seconds for the Fail-safe setting change to take effect.
Warranty and post-warranty service
All KAVAN® electronic products are covered by a 2-year warranty covering all manufacturing defects and faults. When claiming within the warranty period, please always present a copy of the proof of purchase with the product and provide service personnel with as detailed and complete information as possible about the defect found, your usage and other information that will facilitate the assessment of the claim and speed up its settlement. Please make your claim at the shop where you purchased the product. If this is not possible, you can contact KAVAN Europe s.r.o. directly:
KAVAN Europe s.r.o. | Doubravice 110, 533 Pardubice | Czech Republic | +420 466 260 133 | info@kavanrc.com
Warranty and limitation of liability
As the manufacturer of this product, we have no control over your compliance with these instructions when wiring and installing the RC set into your model. Likewise, we have no control over the way you build, operate and maintain the RC set parts. For this reason, KAVAN must disclaim all liability for any loss, damage or financial cost that is caused by the improper use or operation of products imported by us, or that is in any way connected with such activity.
Except as otherwise provided by law, KAVAN‘s obligation to pay compensation shall (regardless of the legal arguments asserted) be limited to the purchase price for those KAVAN products that were directly involved in the event that caused the damage. This does not apply if the manufacturer has been judicially obliged to make unlimited compensation on the basis of proven wilful or gross negligence. We warrant that our products are in compliance with current legal provisions. The warranty does not cover failures and defects caused by:
- Misuse or improper use.
- Delayed, improper or no maintenance, or maintenance performed by unauthorized service.
- Incorrect wiring.
- Use of accessories not approved or recommended by KAVAN Europe s.r.o.
- Modifications or repairs not carried out by an authorised KAVAN Europe s.r.o.
- Inadvertent or deliberate damage.
- Normal wear and tear.
- Operation of the equipment outside the operating limits specified in the specification
KAVAN Europe s.r.o. warrants that this product is free from defects in both material and workmanship at the time of sale. KAVAN Europe s.r.o. also reserves the right to change or modify this warranty without notice. The equipment is subject to continuous improvement and refinement - the manufacturer reserves the right to change the design without notice.
This warranty certificate entitles you to a free warranty repair of the product supplied by KAVAN Europe s.r.o. within a period of 24 months. The warranty does not cover natural wear and tear due to normal use, as this is a product for modelling use, where the individual parts operate under much higher loads than normal toys are subjected to.
The warranty also does not cover any part of the equipment that has been improperly installed, roughly or improperly handled, or damaged in an accident, or any part of the equipment that has been repaired or altered by an unauthorized person (this includes the application of any waterproof sprays/coatings by the user). Like other fine electronics products, do not expose this equipment to high temperatures, low temperatures, moisture, dusty environments, violent mechanical shocks and impacts. Do not leave it in direct sunlight for extended periods of time.
Please claim warranty repairs from the shop where you purchased the set.
Recycling (European Union)

Electrical equipment bearing the crossed-out bin symbol must not be disposed of in normal household waste but must instead be taken to a specialised collection and recycling facility. In EU (European Union) countries, electrical equipment must not be disposed of in normal household waste (WEEE - Waste of Electrical and Electronic Equipment, Directive 2012/19/EU). You can take unwanted equipment to your nearest collection or recycling centre. The equipment will then be disposed of or recycled safely free of charge. By handing in your unwanted equipment, you can make an important contribution to protecting the environment.
EU declaration of conformity

KAVAN Europe s.r.o. hereby declares that the radio equipment type R8 and other equipment supplied with it are in compliance with Directive 2014/53/EU. The full text of the EU Declaration of Conformity is available at the following website: http://www.kavanrc.com/doc. This 2.4GHz radio equipment can be used without prior registration or individual approval in all countries of the European Union.