KAVAN Resco 1990mm – Instruction manual
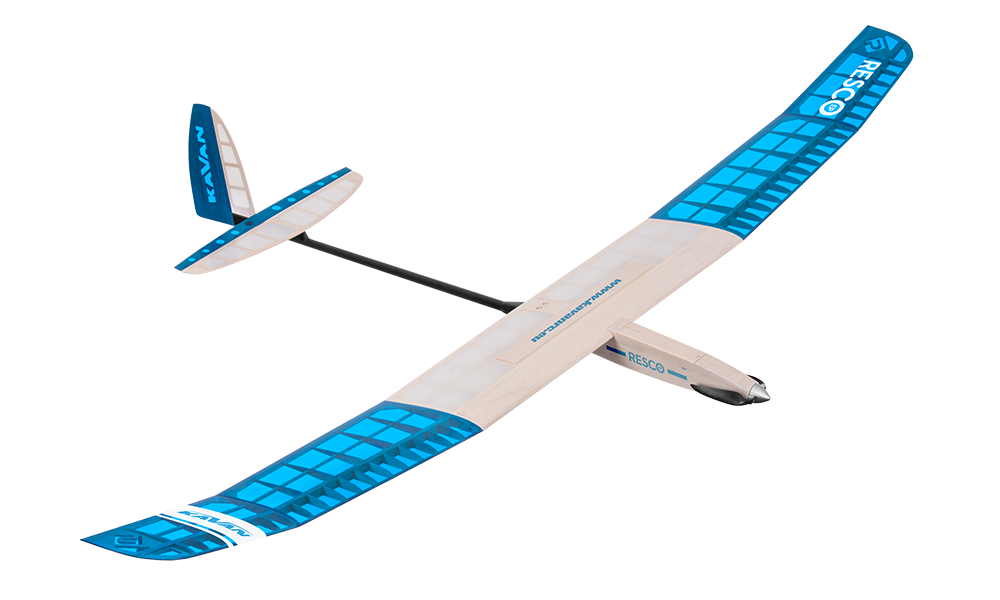
KAVAN Resco – kit
Introduction
A two-meter thermal glider is one of the most rewarding machines in a recreational modeller's hangar – nothing compares to peaceful relaxing flights in mild conditions, circling in the thermals under the clouds, quietly flying in the early evening when you can sit back and watch your elegant model fly almost on its own… Nowadays, „two-metre“ models with controlled rudder, elevator and aerodynamic brake, taking off with the help of rubber line, have their own special competition category F3L, where it is not about life or death, but flying together with like-minded modellers.
The „two-metres“ are also ideal for anyone who wants to start building models of their own, the classic way from balsa, plywood and spruce beams. The building goes nicely fast, there is not much of it, but at the same time, you will learn all the basic techniques necessary for larger and more complex models. And if you mess up the first time – you only need a piece of balsa to fix the failure.
Before you start
- If you are new to model aircraft, ask an experienced modeller to check your completed model and help you with the first flights. Your model shop or local model flying club can help you find an instructor.
- Build the model according to these instructions. Do not alter or modify it, as this can make it unsafe or unable to fly. Take time to build everything straight, true and strong.
- Check the kit for missing or damaged parts before starting. Familiarise yourself with each component and contact your dealer immediately if a replacement is needed.
- Trial fit every part before gluing. Check that you have the correct part and that it fits properly; extra glue cannot compensate for a poor fit.
- Set the centre of gravity (CG) and control throws as described in Pre-flight preparation before the first flight. Incorrect balance can make the model unstable or unable to fly.
Check the contents and report missing or damaged parts before starting construction.
Safety precautions
This model is not a toy. Even though it is light and slow in flight, incorrect handling can cause injury or damage. Build, test and fly it responsibly, following the instructions, applicable model flying safety rules and common sense.
Use suitable tools and accessories in good condition. Install all parts correctly and check the model before the first and every subsequent flight. Do not fly a damaged model. Beginners should fly with help from an experienced modeller.
Children under the age of 14 must operate the model under adult supervision. Fly in calm weather or a light breeze at a safe site away from obstacles.
Features
- High-performance thermal glider
- Designed and manufactured in the Czech Republic
- Extensively pre-processed
- Controlled airbrake
- Great flight characteristics
Technical specifications
| Parameter | Value |
|---|---|
| Wingspan | 1990 mm |
| Length | 1125 mm |
| All-up weight | From 440 g |
| Wing area | 36.16 dm² |
| Wing section | modified AG |
| CG position | 78–82 mm behind the wing leading edge; start at 78 mm |
| Controls | Rudder, elevator, spoiler |
Set contents
CNC-cut balsa and plywood parts, hardwood sticks and balsa sheets, carbon tail boom, accessories set, sheet of stickers, full-size building plan, and instruction manual.
Recommended RC equipment
Use at least three channels for the glider with its spoiler; the electric version also needs a throttle channel. Use suitable 9–15g micro servos with a torque of 1.5–2 kg·cm. The spoiler is strongly recommended for the glider version.
- Rudder and elevator servo: 2× KAVAN GO-09 Plus
- Spoiler servo: KAVAN GO-13MG
- Receiver battery: Panasonic Eneloop AAA 800 mAh 4.8 V pack
Recommended propulsion (electric version)
| Motor | ESC | Propeller | Battery | |
|---|---|---|---|---|
| A | KAVAN C2826-1000 (KAV30.0208) | KAVAN R-20B Plus | 9×5″ | KAVAN LiPo 450 mAh / 11.1 V (3S) (KAV33.7106) |
| B | KAVAN C2826-1400 (KAV30.0212) | 8×5″ | KAVAN LiPo 450 mAh / 7.4 V (2S) (KAV33.7104) |
Legacy combo sets for the Resco kit
- KAV30.0108C – Combo set KAVAN C2826-1000 + KAVAN R-20B Plus
- KAV30.0112C – Combo set KAVAN C2826-1400 + KAVAN R-20B Plus
Recommended glues
Unless stated otherwise, use medium cyanoacrylate (CA) glue (KAV56.9952). D-box sheeting and wing ribs are better glued using a water-resistant white aliphatic resin, like our White Glue SUPER KAV56.9960/KAV56.9961 (alternatively, you can use this sort of glue for most of the wood-to-wood joints). The highly loaded parts (wing roots, wing main spars, firewall etc.) should be glued together using 30-minute (or slower) epoxy (KAV56.9965 / KAV56.9966 / KAV56.9967) offering high strength and enough time for the correct positioning.
Tools and accessories
- Very sharp precision knife (KAV66.770 with No. 11 blades)
- Scissors
- Electric drill with drill bits
- Wire cutter
- Long nose pliers
- Screwdrivers
- Razor saw
- Sandpaper No. 80, 100, 180, 360–400
- Needle files
- Clothes pegs, paper clips or small clamps
- Modeller's pins (KAV66.0355)
- Epoxy mixing stick and vessel
- Masking tape, clear sticky tape
- Rubbing alcohol (for cleaning up excessive epoxy)
- Paper tissue or soft cloth (for cleaning up excessive epoxy)
- Straightedge with scale
- Square edge
- Thin clear plastic film (for protecting the building plan)
- Permanent marker
- Modeller’s sealing iron (KAV66.8335), heat gun (for covering)
- Lightweight balsa filler (KAV56.9980 / KAV56.9981 / KAV56.9982)
Main section
Model assembly
Tail surfaces
- Trial fit the parts of the horizontal stabilizer, elevator, fin and rudder – no glue yet! Sand as necessary to obtain the perfect fit. (Fig. 1)
- Roughen the surface of the 3×0.5 mm carbon spar using No. 150 sandpaper and glue it with medium CA to the trailing edge of the fin. (Fig. 2)
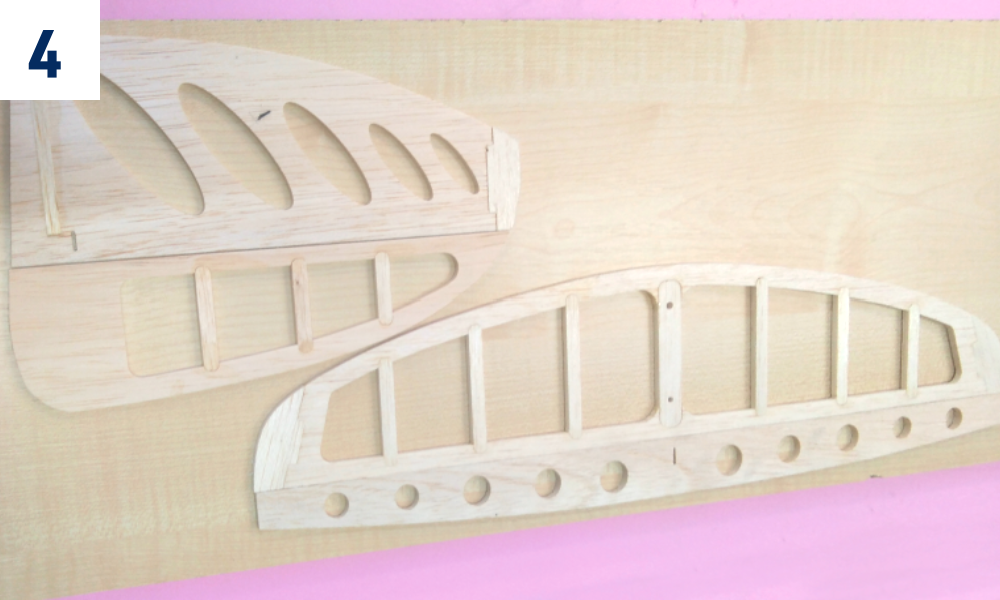
- Glue together all the parts using medium CA or aliphatic resin. (Fig. 3)+(Fig. 4)
Fuselage (glider version)
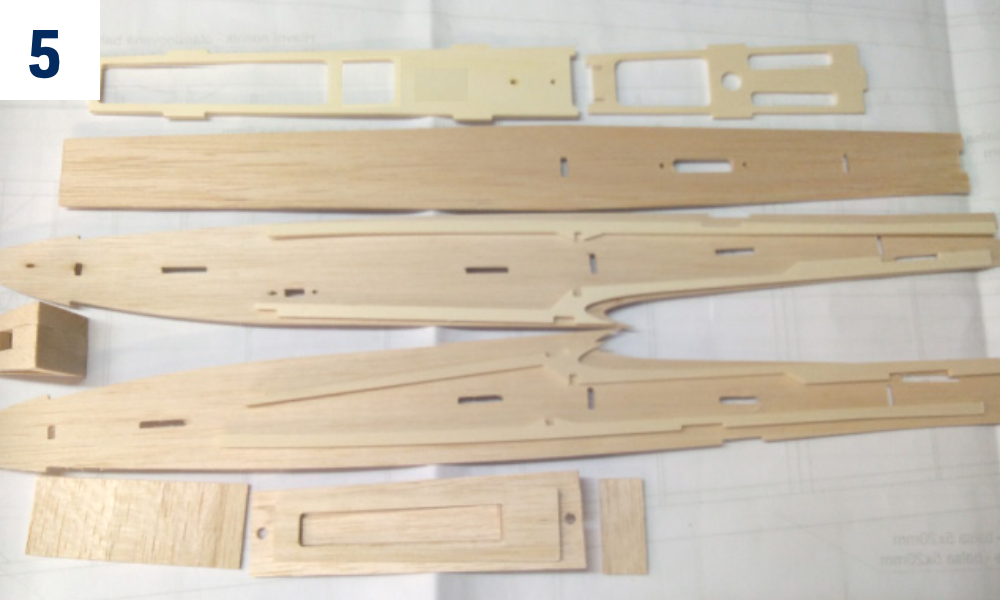
- Trial fit the parts of the fuselage – no glue yet! Sand as necessary to obtain the perfect fit. (Fig. 5)
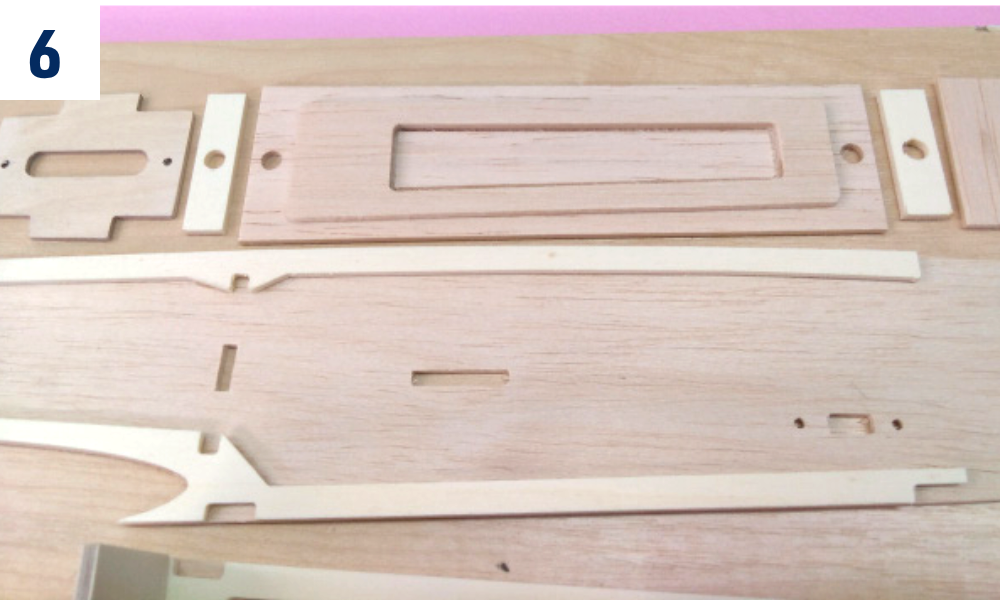
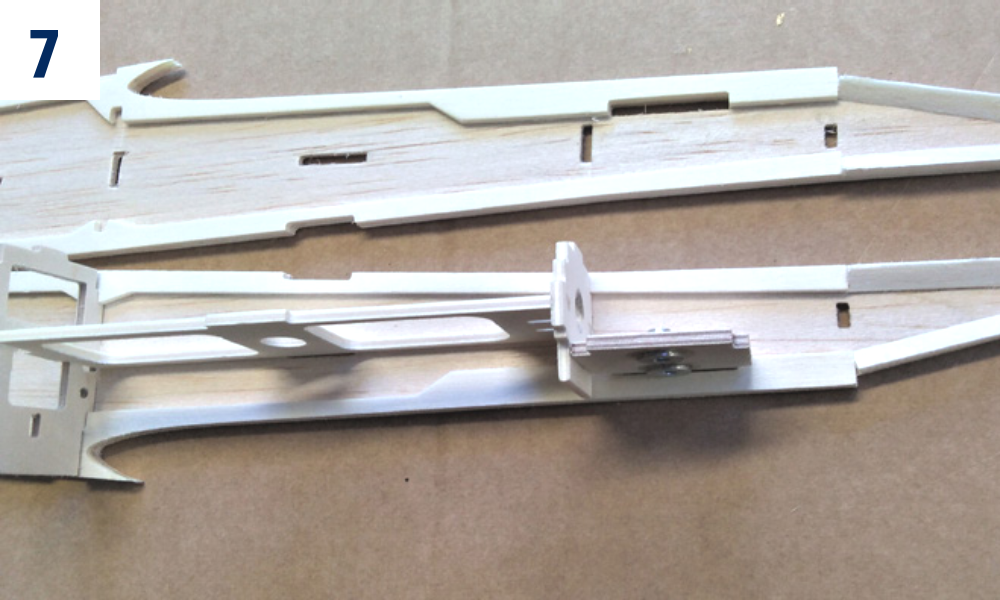
- Glue the ply reinforcement and balsa triangle stocks to the fuselage sides. Glue together the canopy. Glue the canopy magnets before final sanding. Please do not forget to check and mark the polarity of the magnets first – they must attract each other. (Fig. 6)+(Fig. 7)
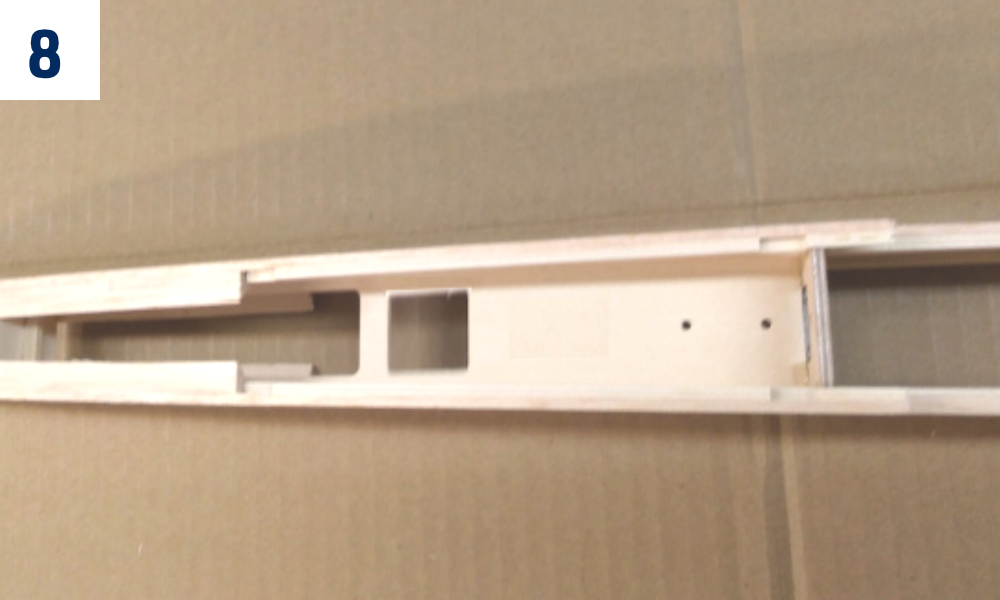
- Glue together the front part of the fuselage. Do not forget to sand the edges of the formers to the shape. (Fig. 8)
- Epoxy the wing nut plate with nuts already glued and the tail boom holding formers in place. (Fig. 7)+(Fig. 8)
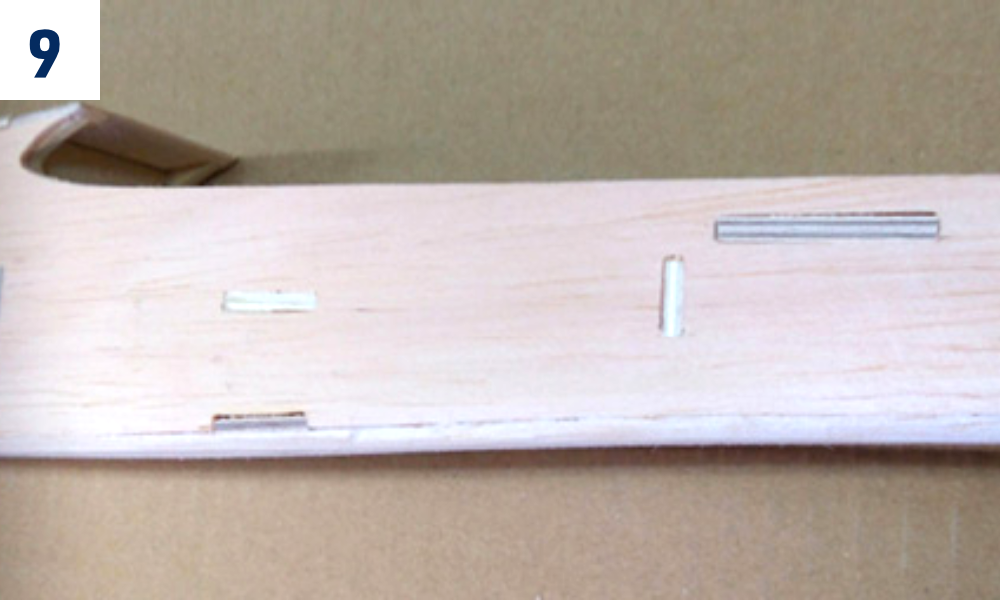
- Glue the nose cone parts in place and sand them to the required shape using the supplied template. (Fig. 8)+(Fig. 9)
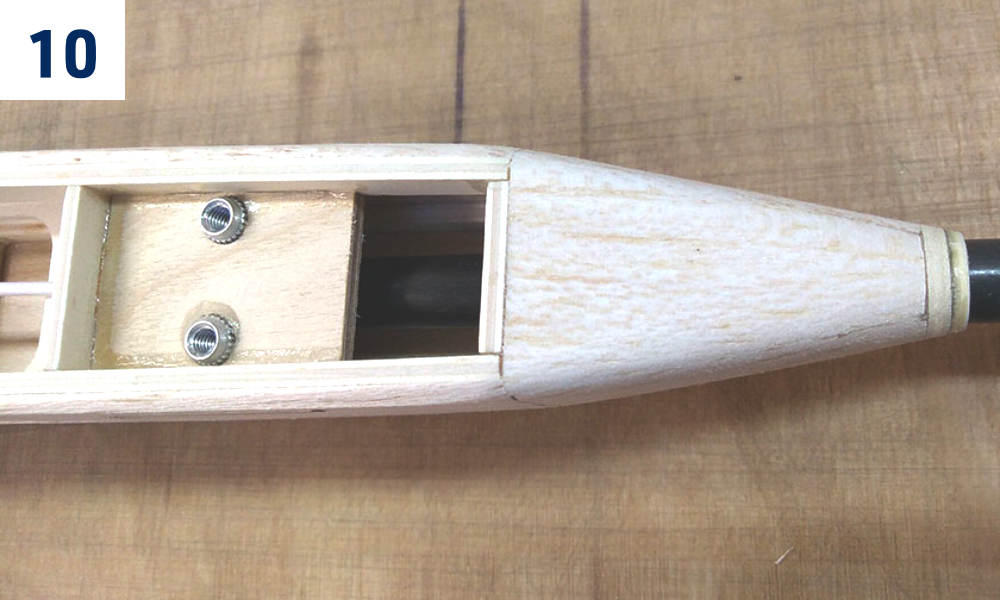
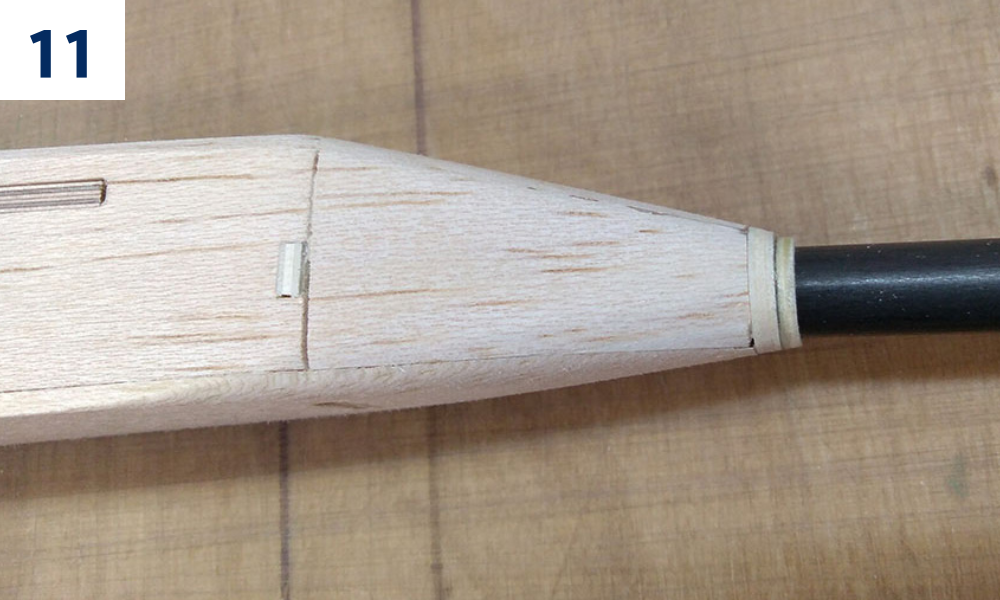
- Partially cut (ca 1 mm deep) and crack the fuselage sides along the rear edge of the rear fuselage former to create a conical transition between the fuselage and the tail boom (the cut line is to be soaked with thin CA before the final sanding). Slide the tail boom fairing ring and the rear fuselage ring onto the tail boom tube (on the end without notches). Insert the tail boom into the fuselage (no glue yet – it will be glued only after the final sanding and covering of the fuselage). Trial fit all the parts and sand carefully to obtain a tight fit; the fairing matching the rear edge of the fuselage. Glue the rear fuselage ring tack to the fuselage (do not glue it to the tail boom) and glue the fairing ring to the tail boom. (Fig. 10)+(Fig. 11)
- Glue the upper and lower sheeting of the fuselage; do not forget to epoxy the tow hook plate.(Fig. 9)+(Fig. 10)+(Fig. 11)
- Attach the canopy to the fuselage and sand everything smooth. (Fig. 9)+(Fig. 10)+(Fig. 11)
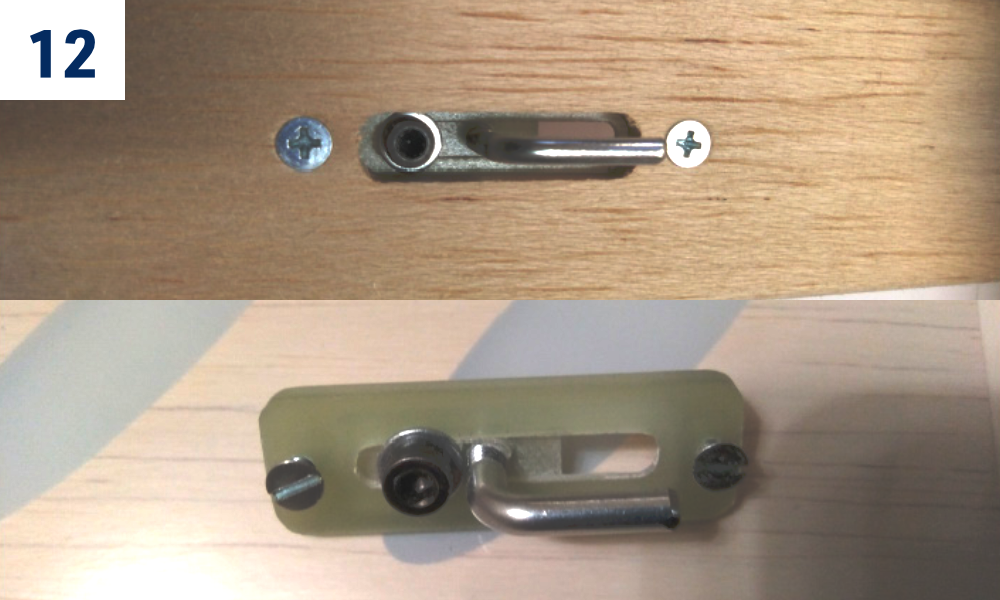
- Locate the tow hook. Cut the opening for it in the lower part of the fuselage and drill the holes for the fixing screws. (Fig. 12)
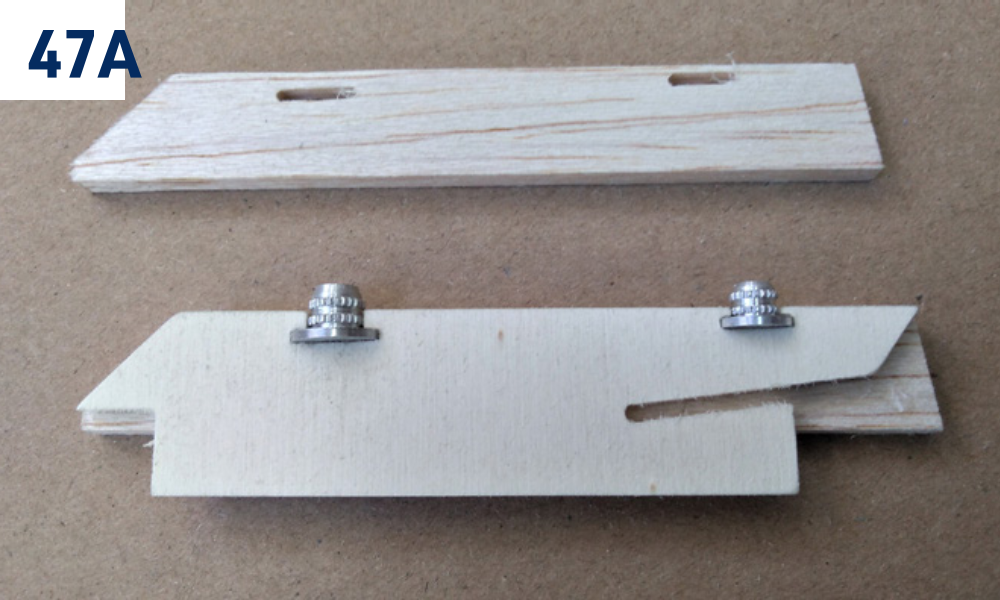
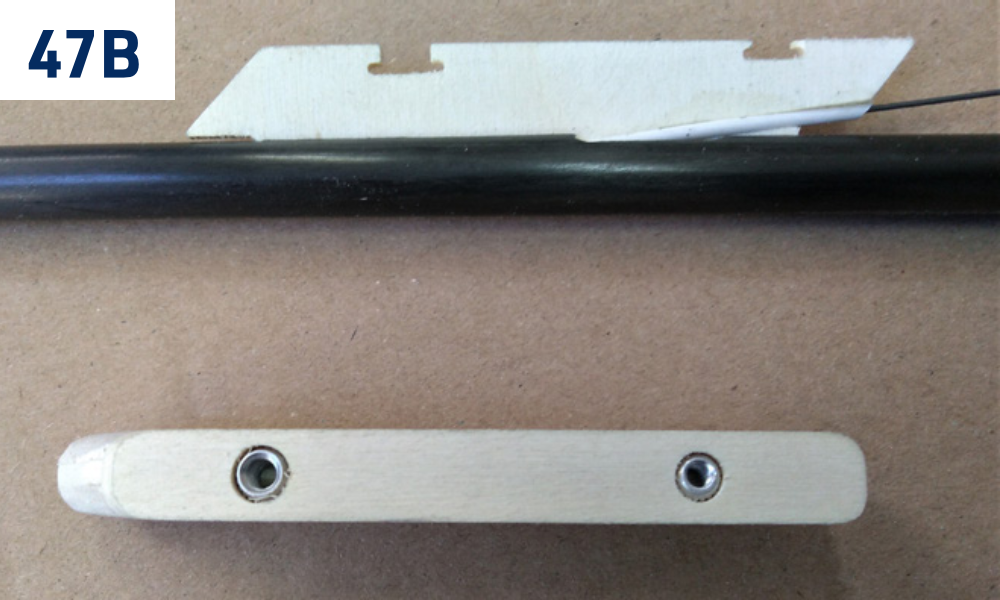
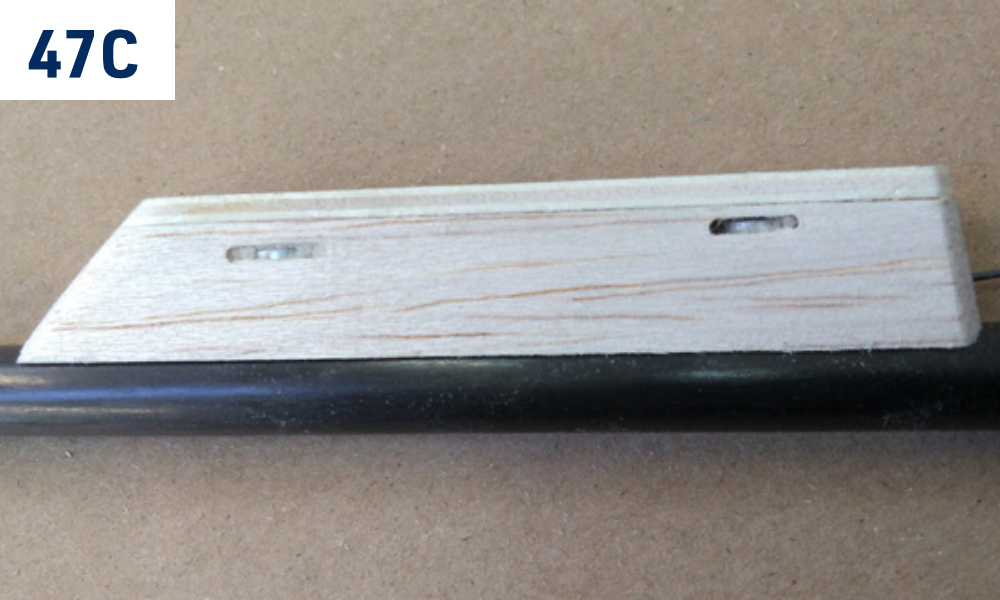
- Assemble (no glue yet) the horizontal tailplane pylon consisting of the liteply core with aluminium tailplane fixing nuts (M4 front, M3 rear), 4 mm balsa sides and liteply tailplane seat. Insert the pylon into the corresponding notch in the tail boom. Trim if necessary, open up the elevator push rod tunnel. Once satisfied, epoxy together the liteply core with the balsa sides and sand to shape using the supplied liteply jig. Epoxy the tailplane seat in place. (Fig. 47A)+(Fig. 47B)+(Fig. 47C)
Fuselage (electric version)
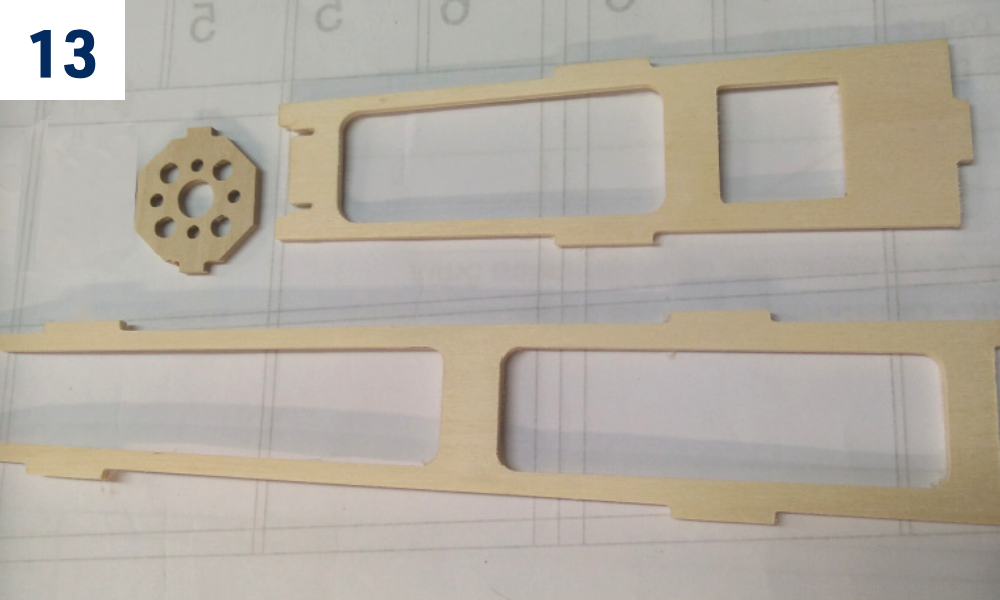
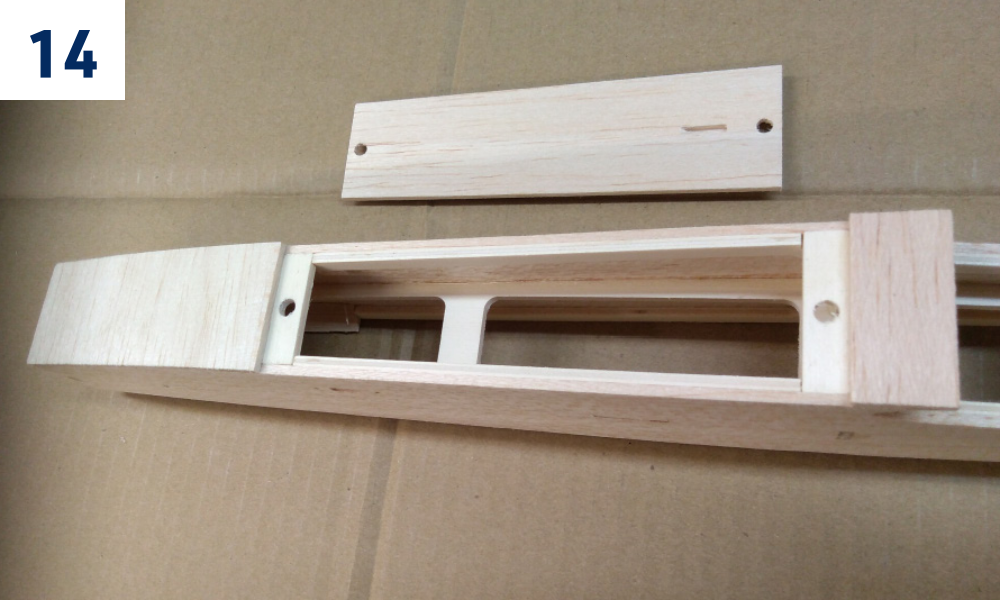
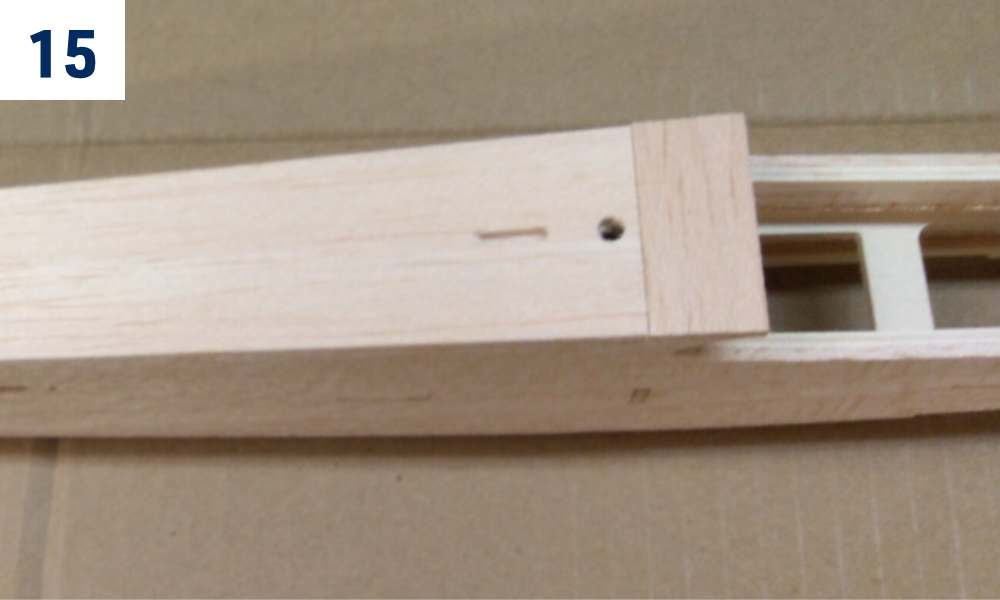
- The building sequence of the electric version fuselage is basically the same as with the glider version except for the firewall and nose. Epoxy the firewall in place and sand the nose to the desired shape matching your spinner. (Fig. 13)+(Fig. 14)+(Fig. 15)
- Before you epoxy the firewall in, make sure the openings and holes in the firewall match your motor – make any changes as necessary or cut a new firewall to match your motor perfectly. (Fig. 13)
Wing centre section
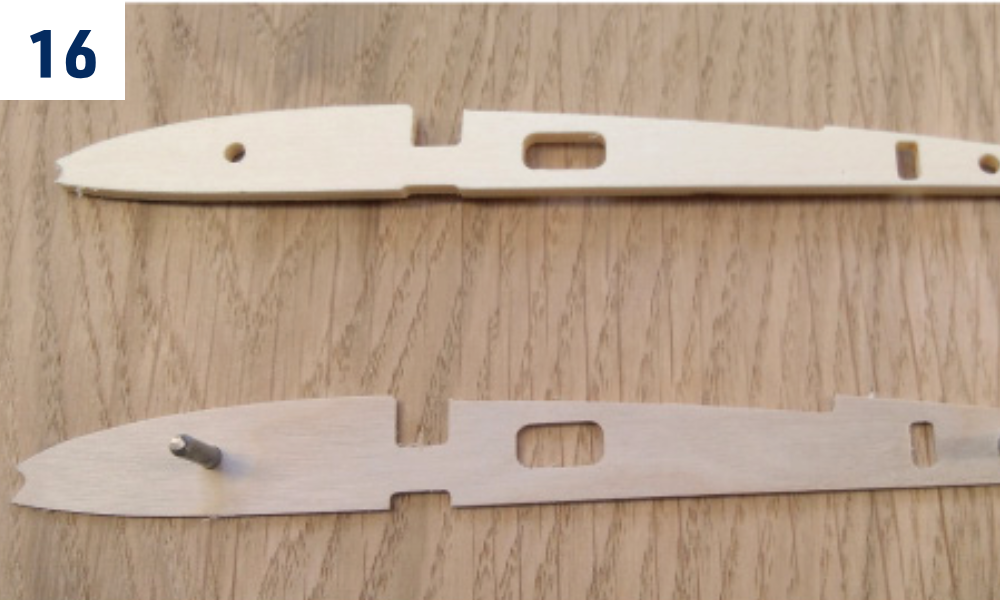
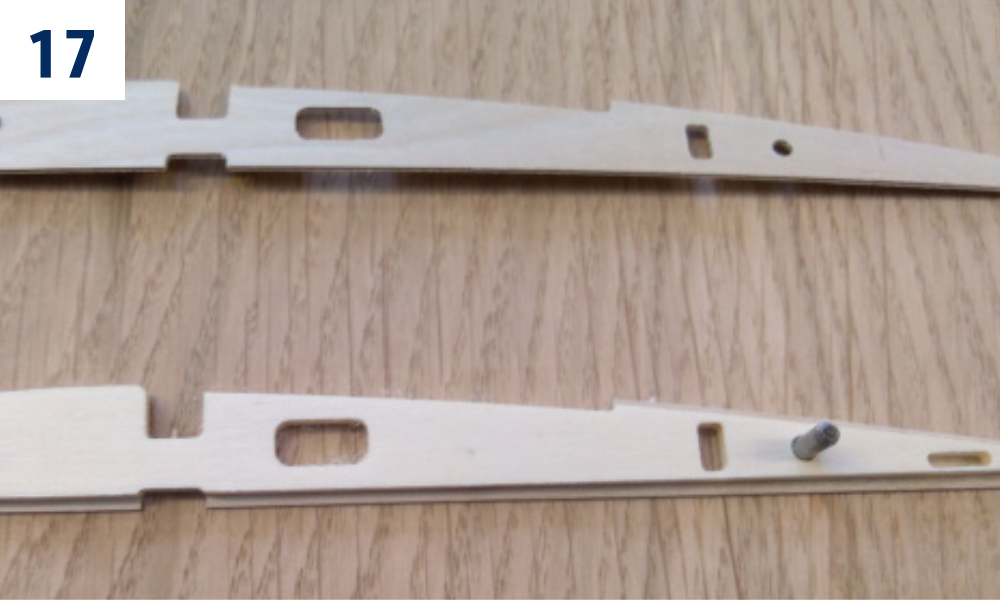
- Epoxy together the wing central ribs. Insert Ø3 mm beech dowels into the holes in order to obtain the correct match. (Fig. 16)+(Fig. 17)
Make a left and right pair of ribs.
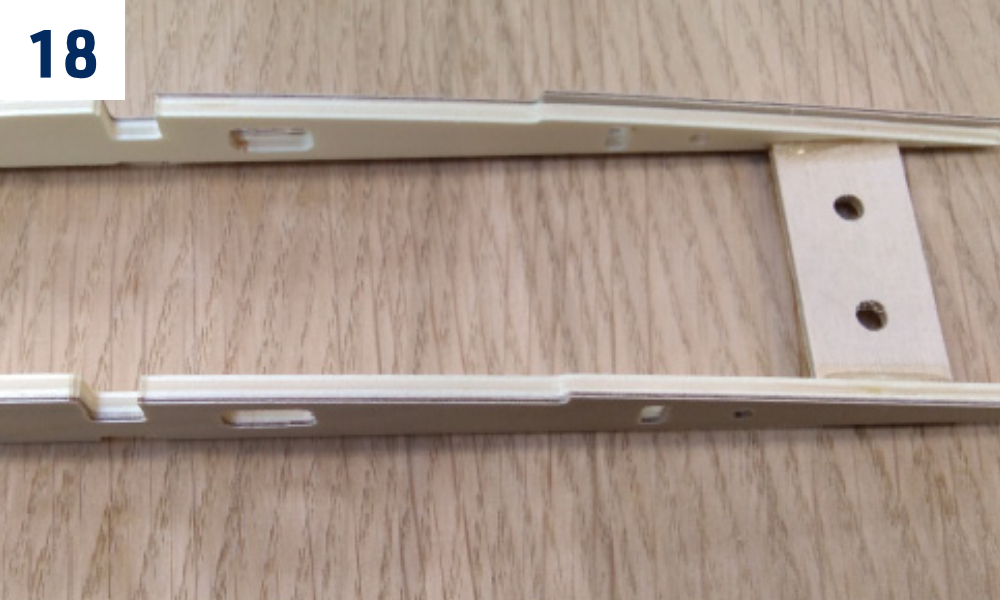
- Epoxy the wing fixing bolt plate between the central ribs. (Fig. 18)
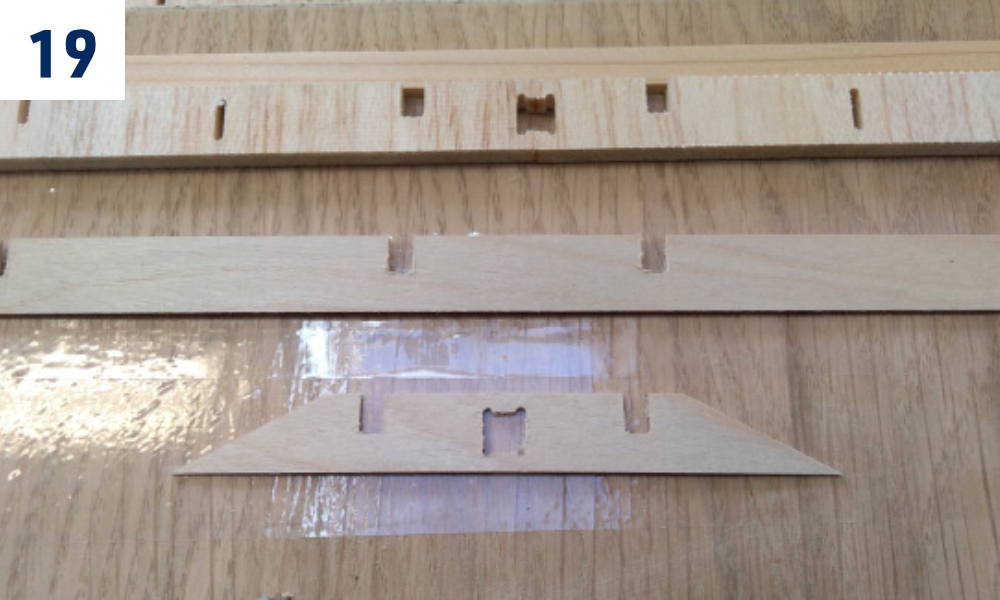
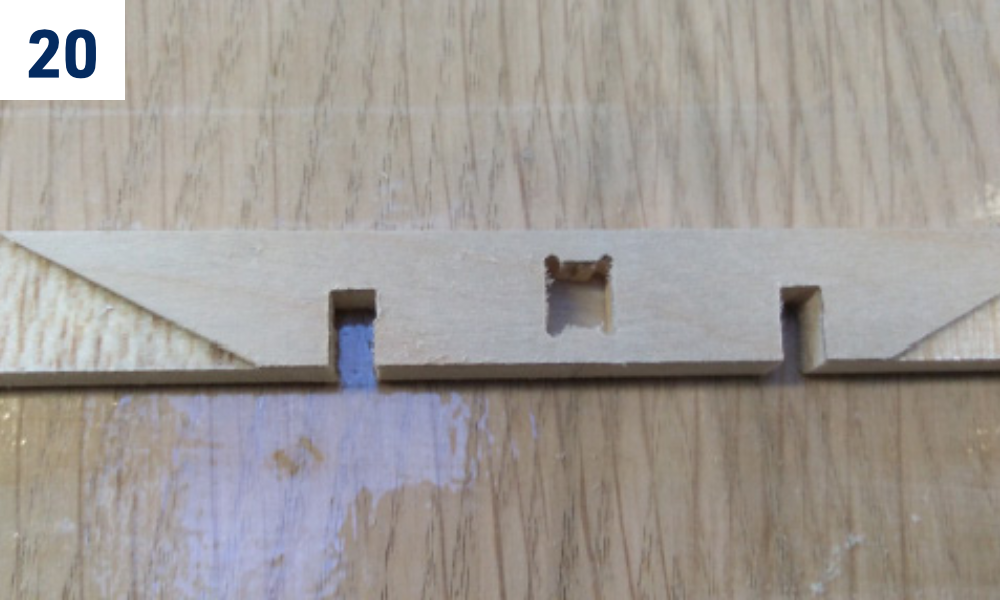
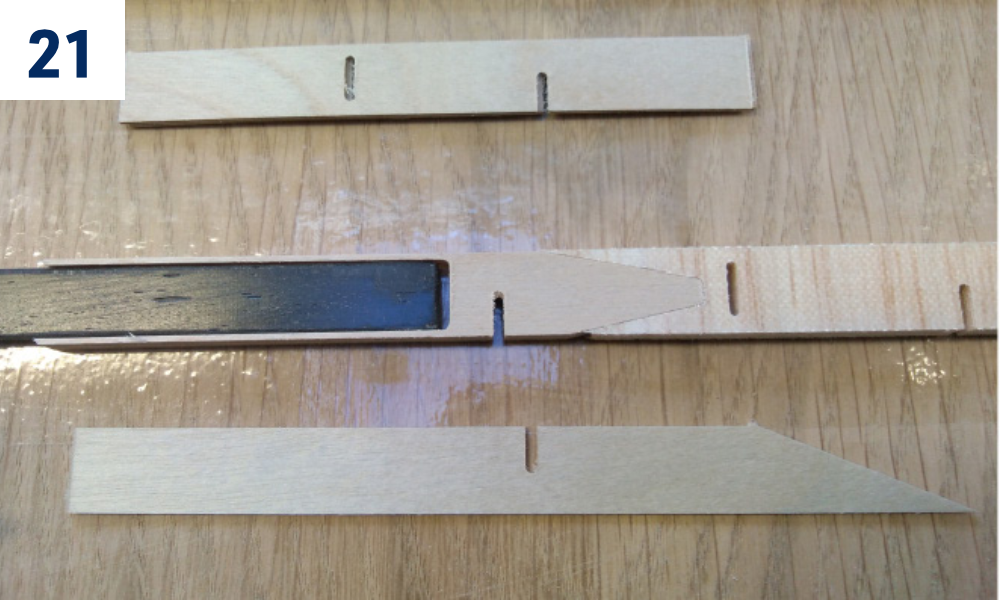
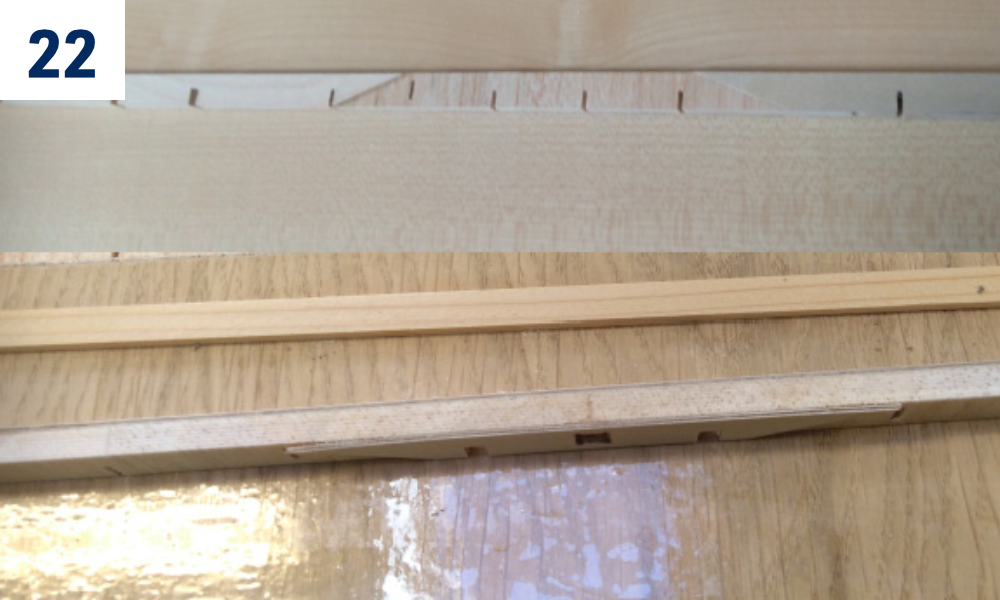
- Epoxy together the parts of the main spar shear webbing. The short 0.8 mm ply joiner (with a hole in the centre) to the front side and the long joiner to the rear side. Make bays for the wing carbon joiner. Epoxy together front (shorter) 0.8 mm ply plate, 5 mm ply central plate and rear 0.8 mm ply (longer, slanted edge) plate. Prevent the epoxy hardening inside the bays – put the parts together with the carbon joiner inserted, then immediately remove the joiner (do not forget to clean the joiner using paper tissue and rubbing alcohol before the glue sets). (Fig. 19)+(Fig. 20)+(Fig. 21)+(Fig. 22)
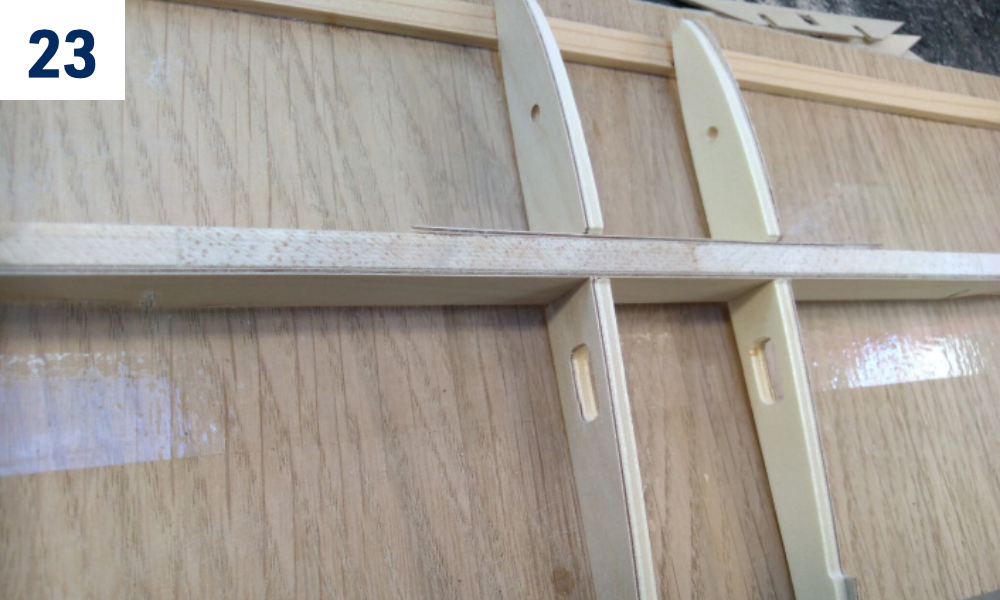
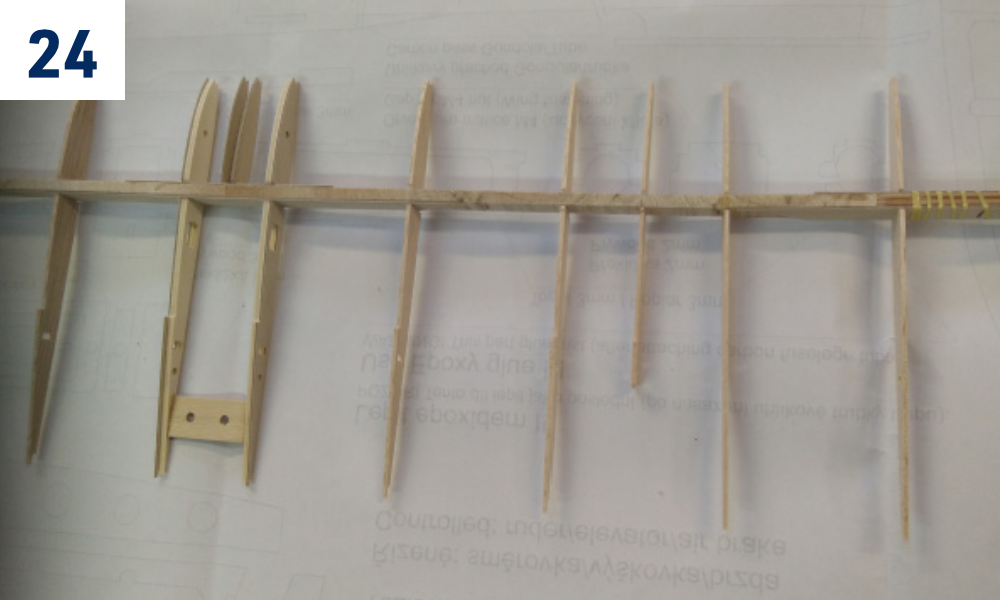
- Slide all ribs onto the main spar shear webbing (no glue yet!). Bind the joiner bays with the provided Kevlar thread and soak with medium CA. (Fig. 23)+(Fig. 24)
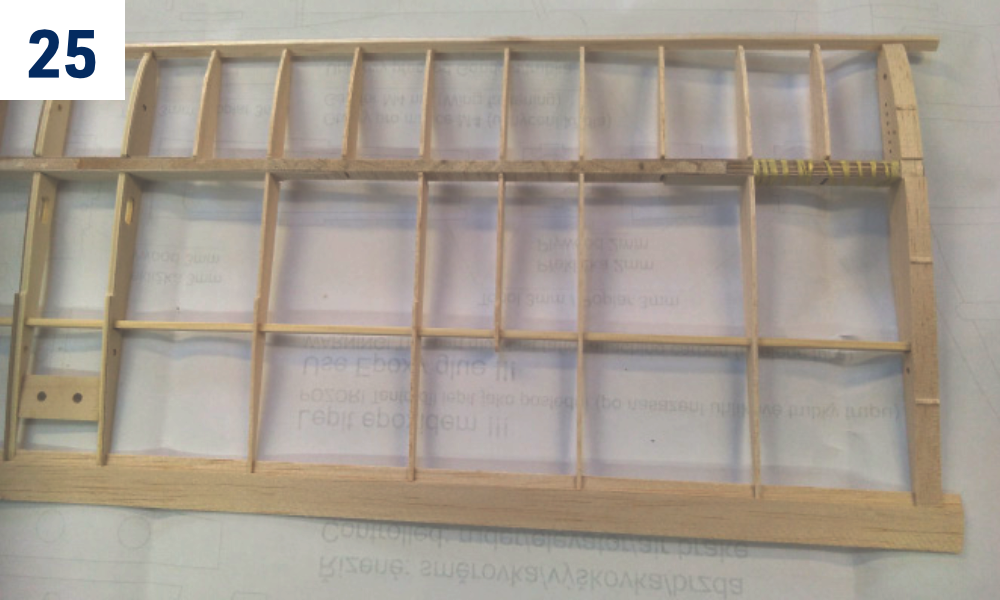
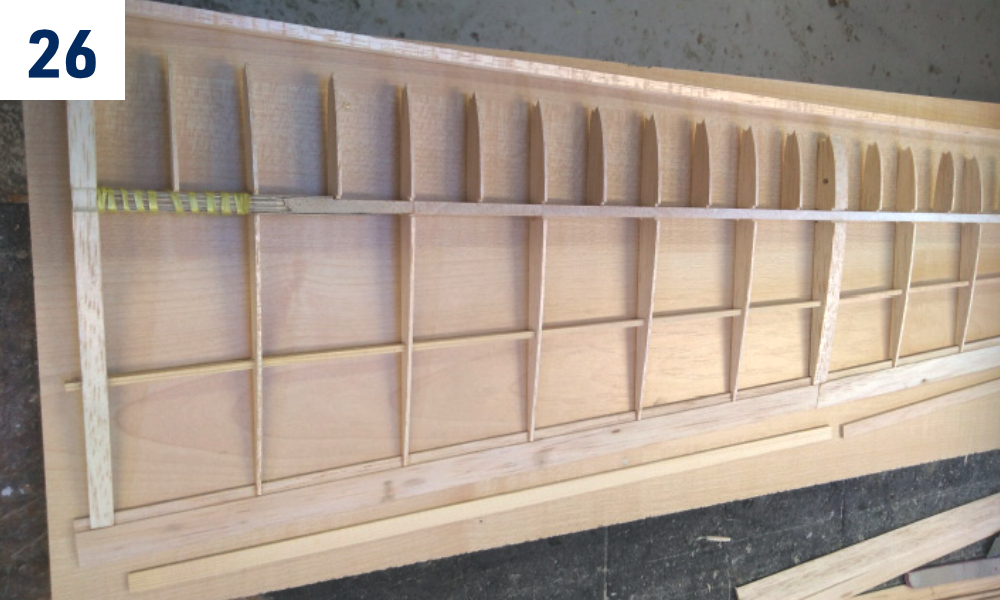
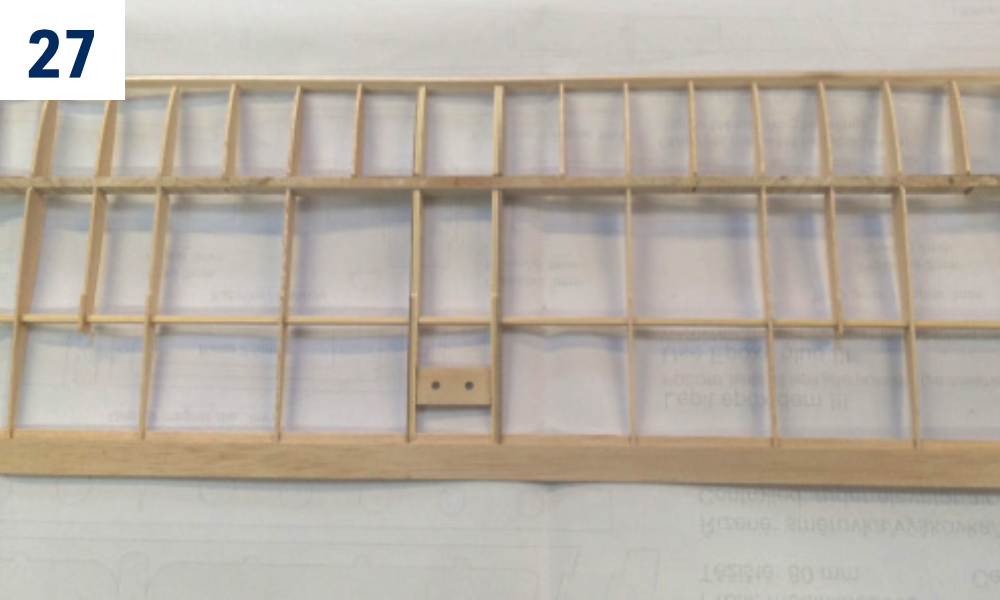
- Insert the rear spar and trial fit the leading and trailing edges. Sand to fit if necessary. Once satisfied with the fit, glue all the parts of the wing centre section with medium cyano over the building plan protected with a sheet of thin clear plastic film (you might find better gluing ribs to the main spar shear webbing with an aliphatic resin). (Fig. 25)+(Fig. 26)+(Fig. 27)
- Glue the lower 8×2 mm spruce stick main spar in place.
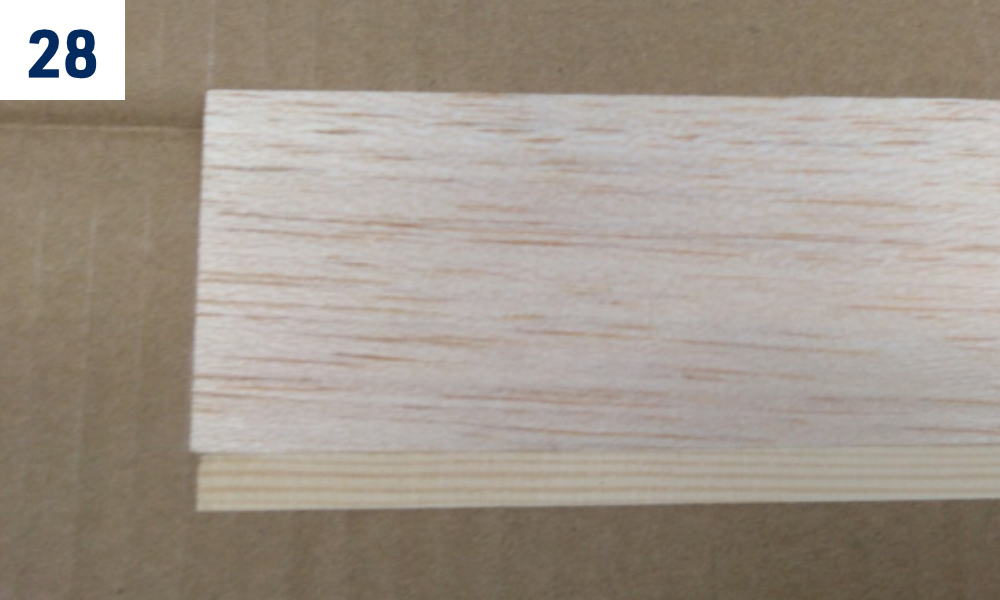
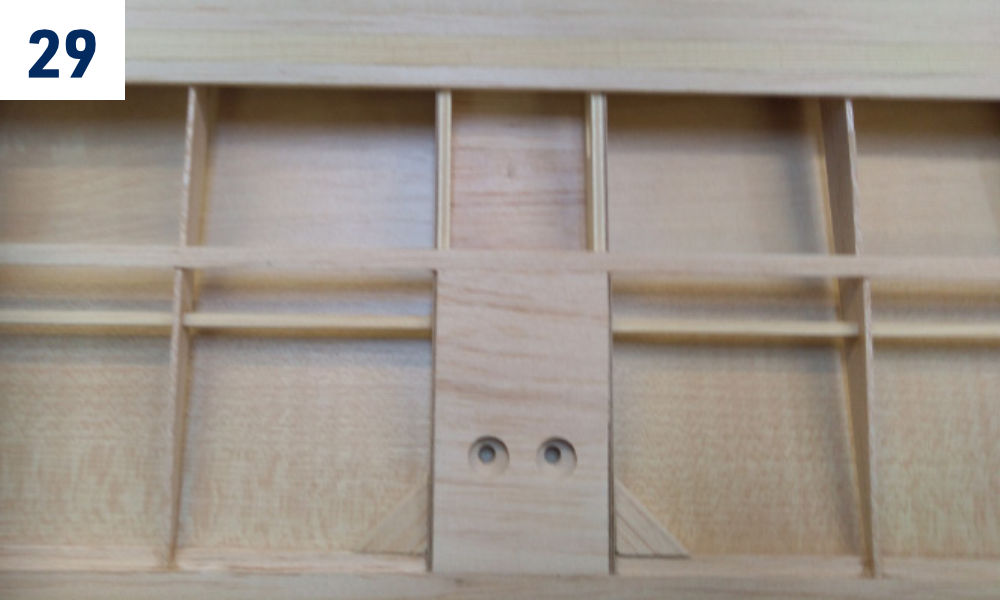
- Edge glue together the upper D-box sheeting (1.5 mm balsa) and the upper 8×2 mm spruce stick main spar. Once cured glue it to the wing using aliphatic resin. (Fig. 28)+(Fig. 29)
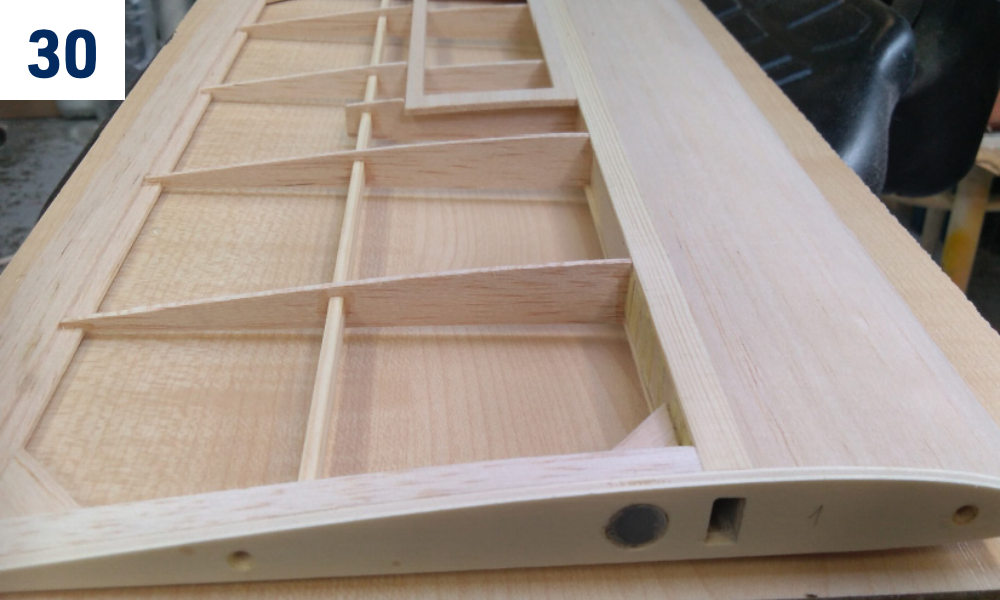
- Bevel both end ribs of the wing centre section using the supplied 7° dihedral jig. Then glue the 3 mm liteply end ribs with magnets. (Fig. 30)
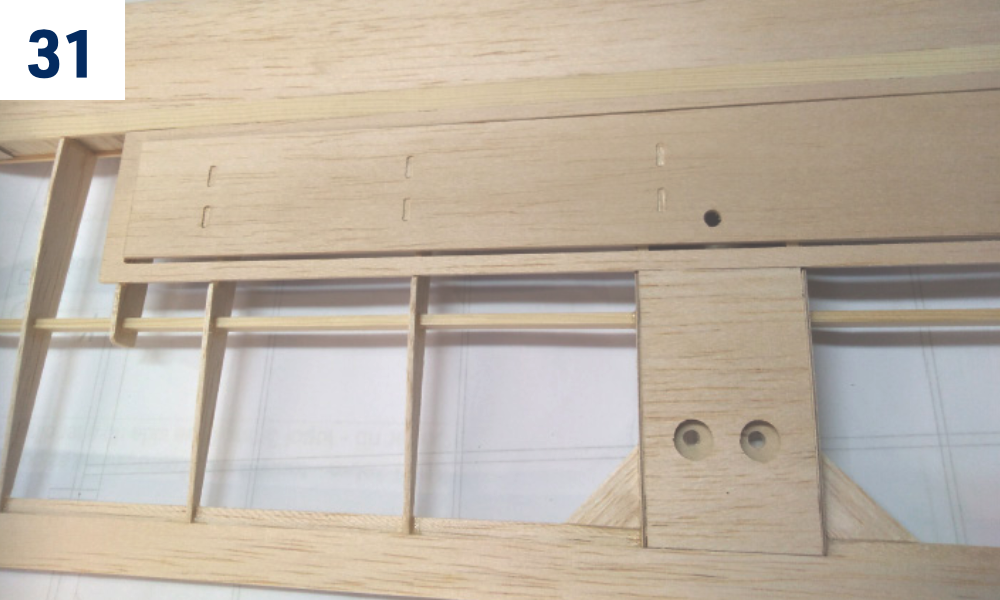
- Glue the air brake frame to the upper side of the wing and sheet the space between the central ribs with 1.5 mm balsa. Cut the openings for the wing fixing bolts. (Fig. 31)
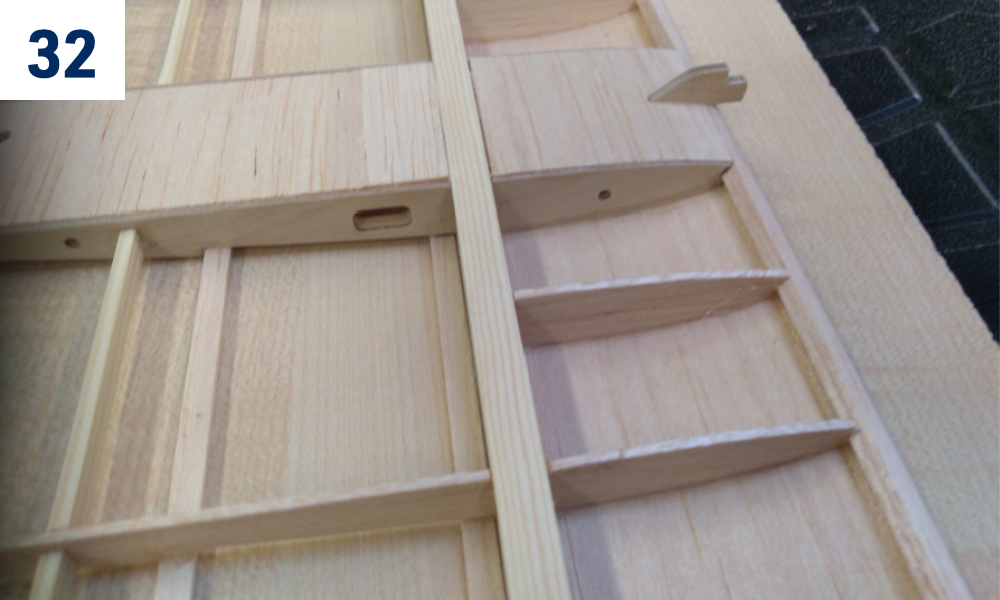
- Epoxy the central half rib with the wing alignment pin and sheet the space between the central ribs from below with 1.5 mm balsa. Cut the openings for the wing fixing bolts. (Fig. 32)
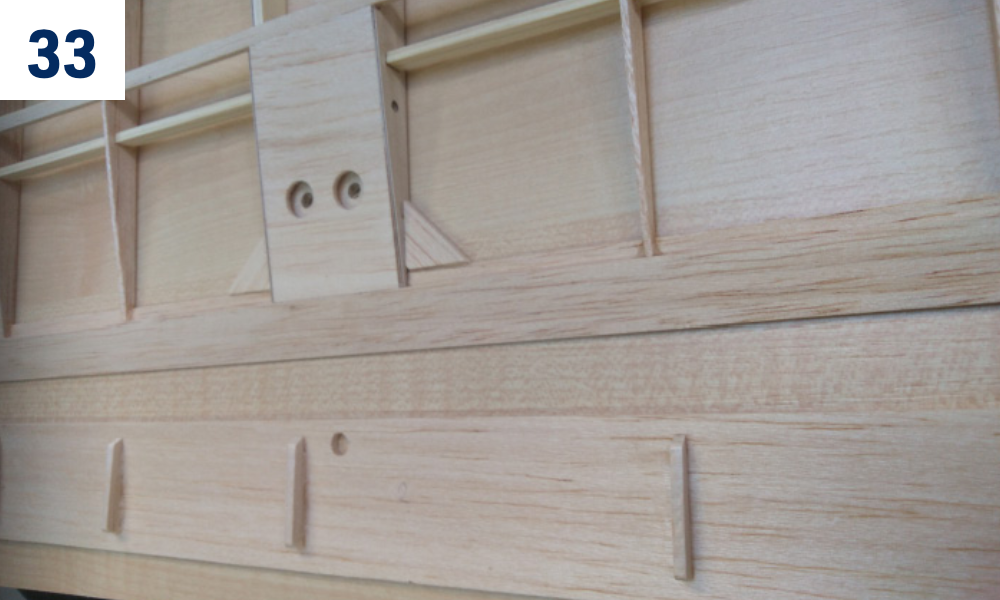
- Glue the reinforcements perpendicular to the underside of the 2.5 mm balsa spoiler. (Fig. 33)
- Fine sand the entire wing centre section (including the air brake).
Wing outer panels
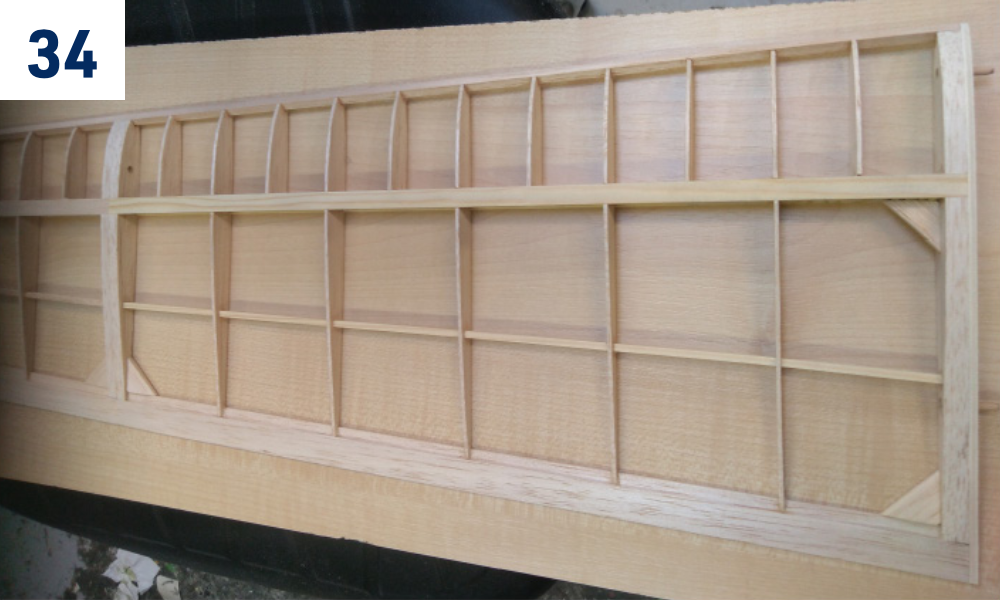
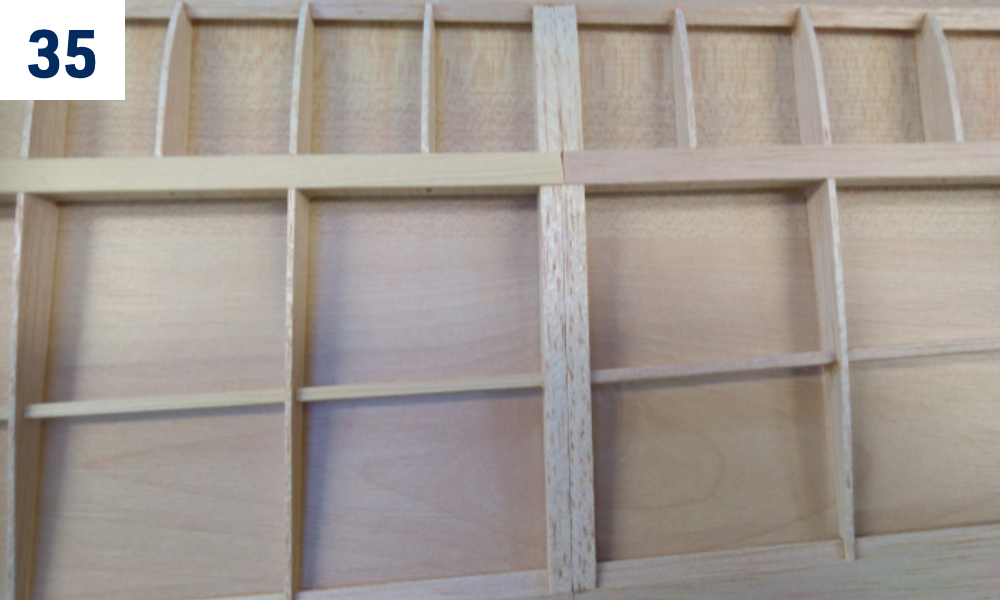
- The wing outer panels are to be constructed in the same manner as the wing centre section; the main difference is that the inner part and the outer winglet are built as one part on a flat surface. Once the structure is finished, you will cut it between the end/root ribs and bevel to obtain the correct dihedral and glue together. (Fig. 34)+(Fig. 35)
- Glue together both wing outer panels over the building plan protected with a sheet of thin clear plastic film (remember – you are building left and right wing panels!). Please note, the inner spars are made of spruce sticks, whilst the winglet spars are made of balsa sticks.
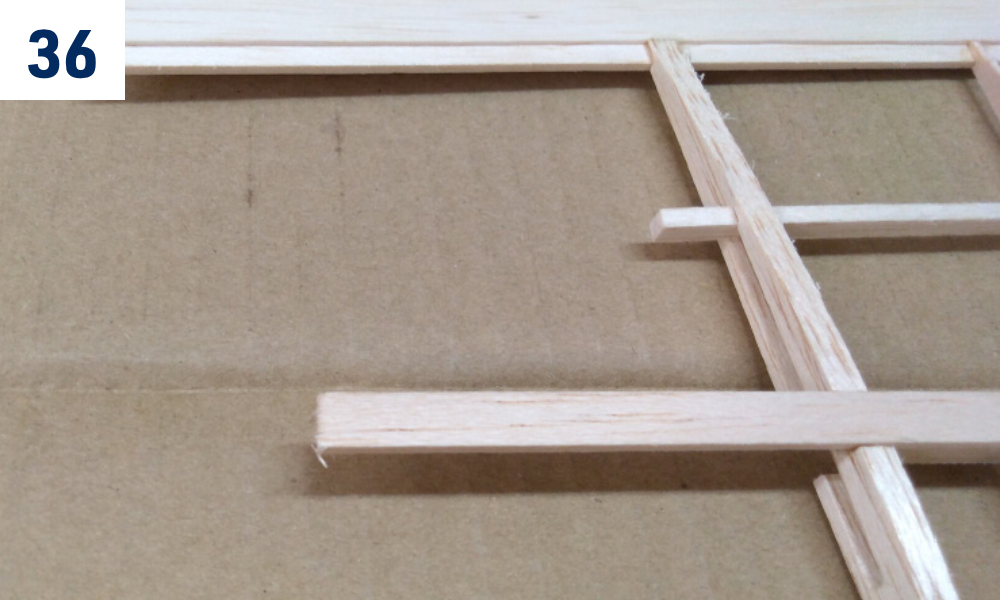
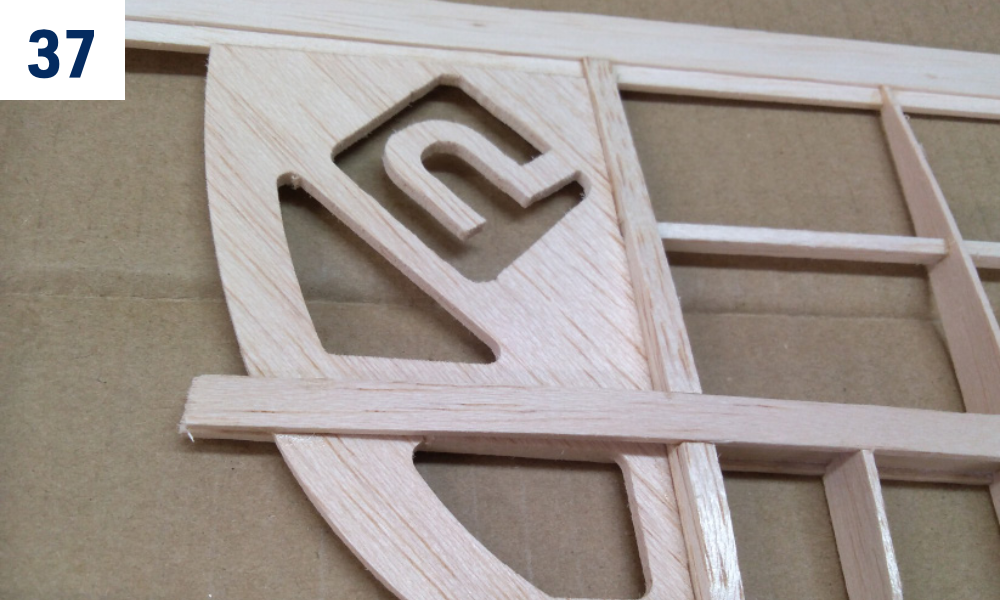
- Glue the wing tips. Bevel the ends of the main spar sticks and glue them to the wing tips. (Fig. 36)+(Fig. 37)
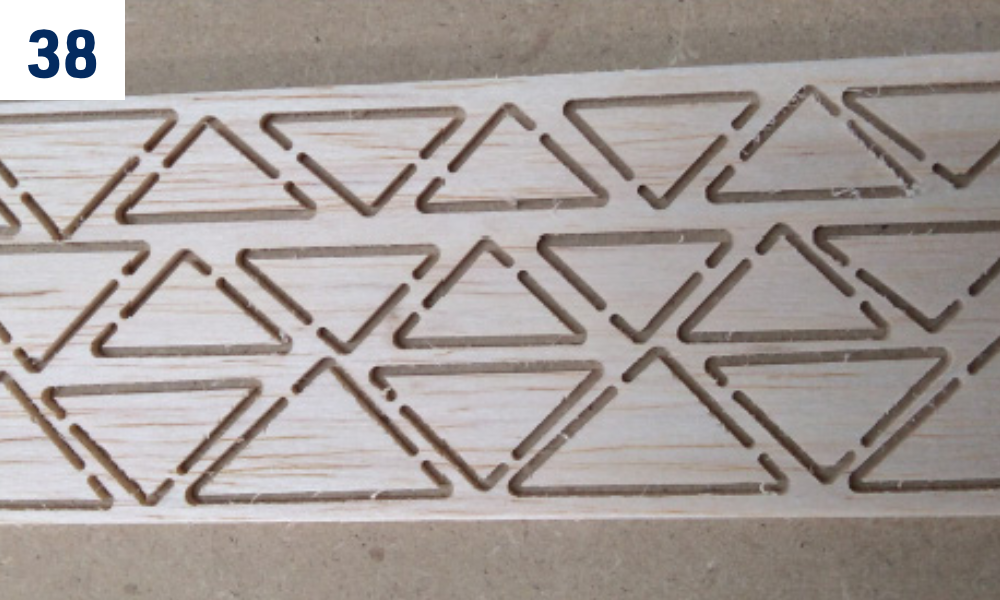
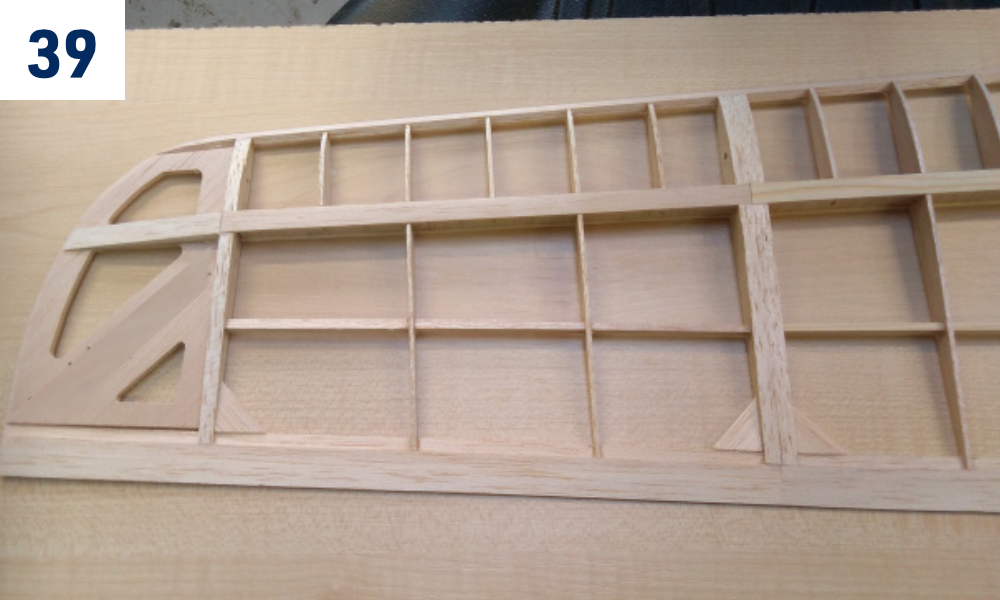
- Glue 2.5 mm balsa triangular wing gussets. (Fig. 38)+(Fig. 39)
- Fine-sand the entire wing's outer panels.
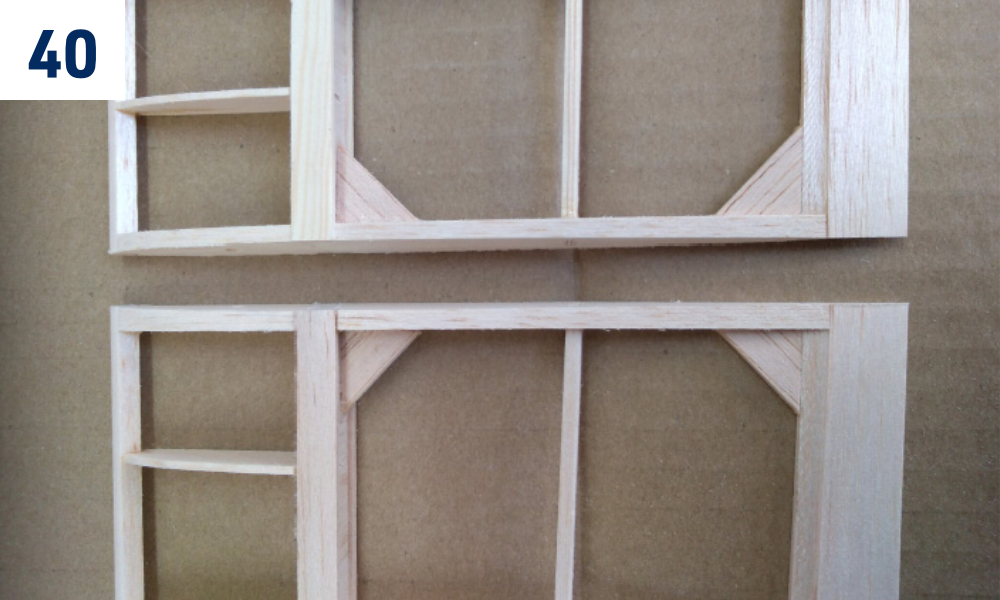
- Cut off the outer winglets between the end ribs. Bevel the end ribs using the supplied 8° dihedral jig. (Fig. 40)
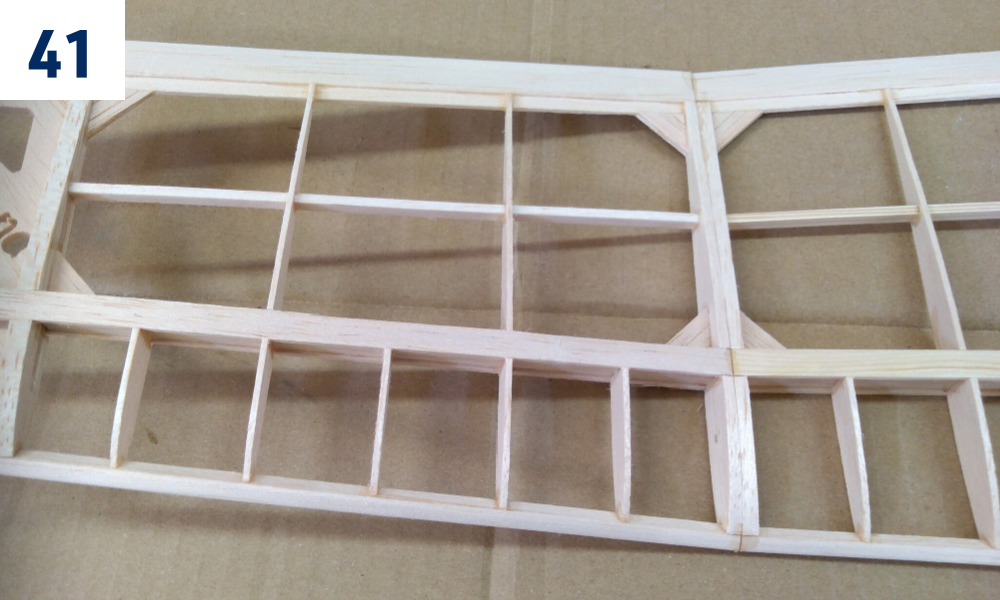
- Epoxy the wing panels and winglets together. (Fig. 41)
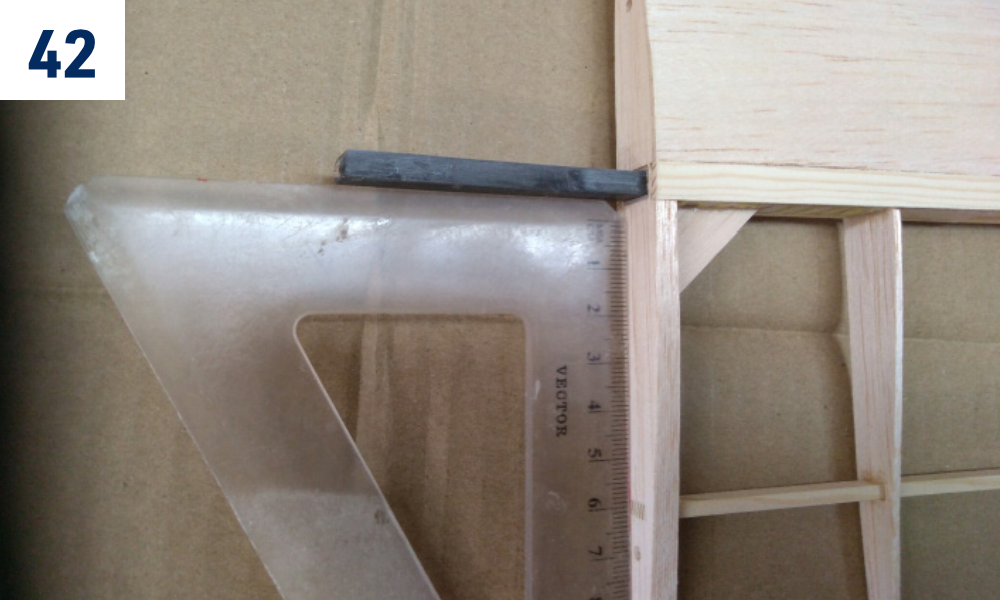
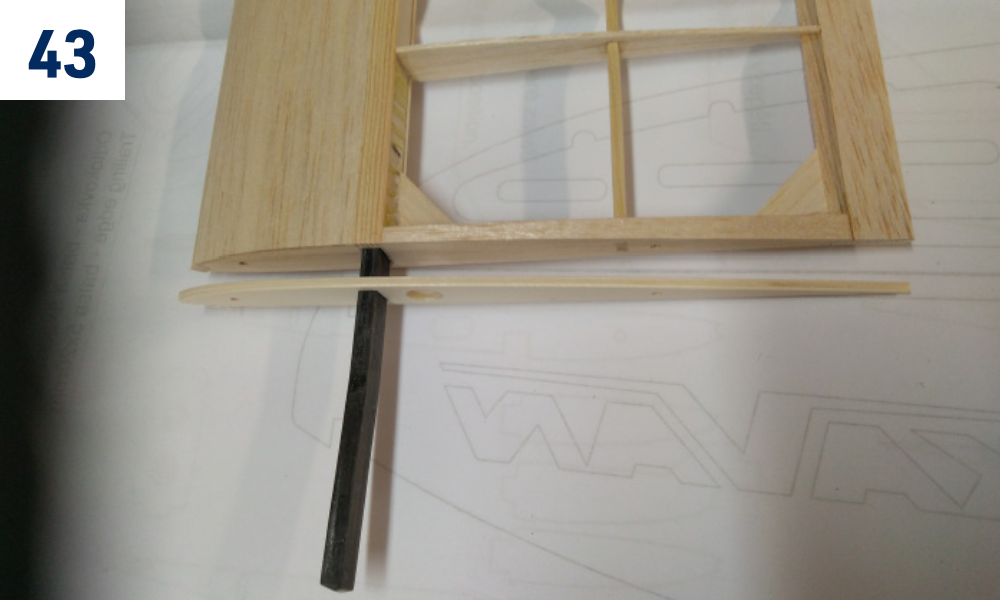
- Bevel the root ribs of the wing outer panels using the supplied 7° dihedral jig. Trial fit the carbon wing joiner into the respective bays. There should be a tight fit, no play. If there is a significant play, put some epoxy in the appropriate area of the joiner and sand as necessary once the glue hardens. (Fig. 42)+(Fig. 43)
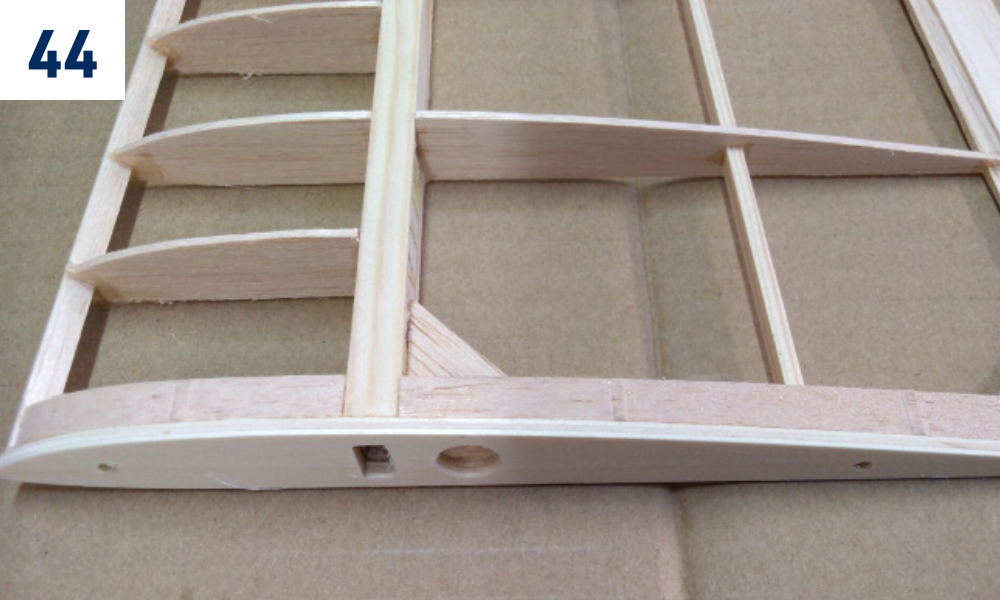
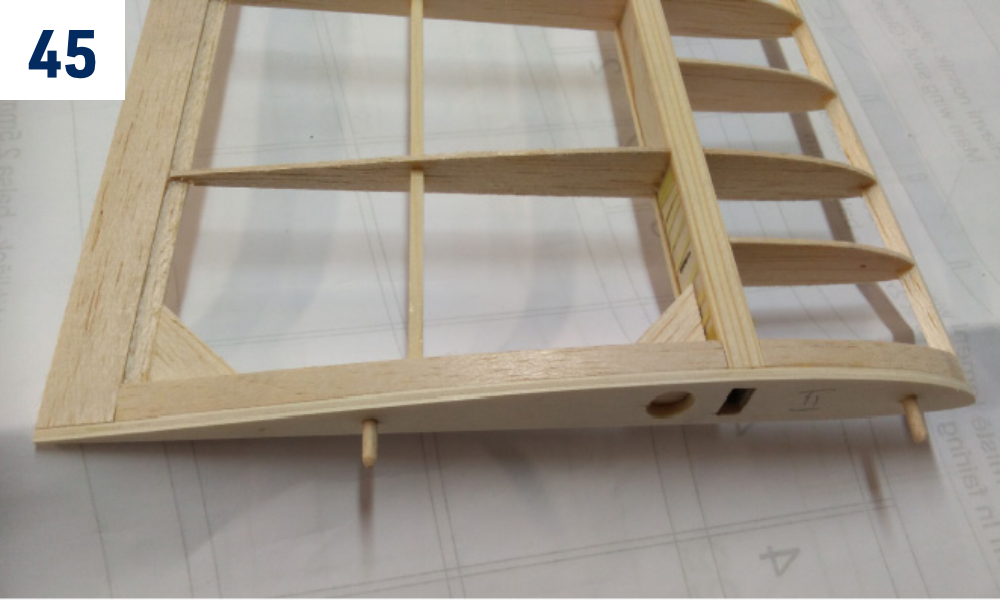
- Glue the 3 mm liteply root ribs with Ø3 mm beech alignment pins. (Fig. 44)+(Fig. 45)
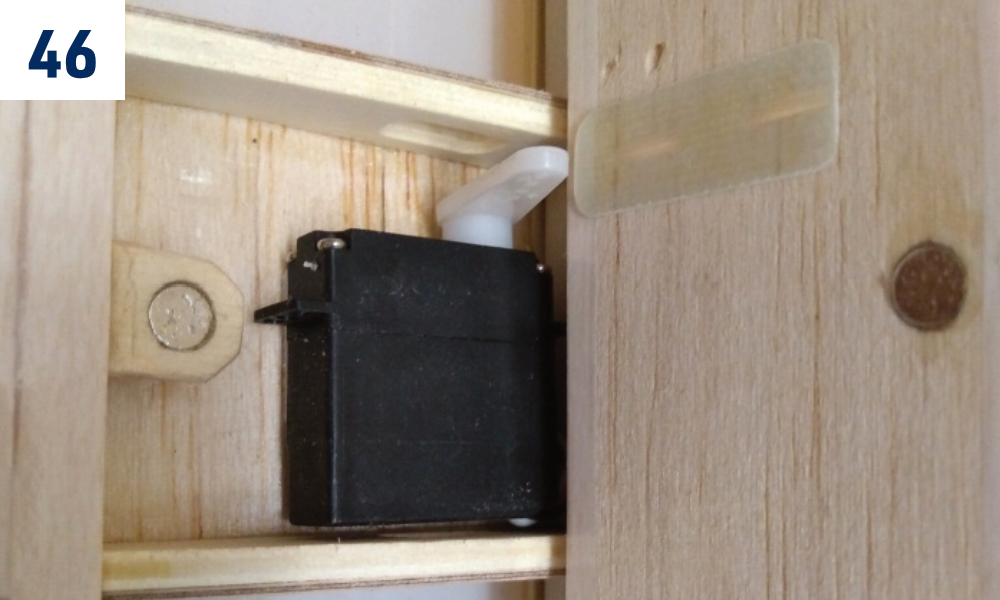
- Prepare everything for the airbrake servo installation. Glue the fibreglass plate to the lower surface of the airbrake and the liteply magnet holder to the rear of the servo bay. (Fig. 46) Glue the magnet pair into the wing holder and spoiler, checking that the magnets attract each other.
- The spoiler servo is to be installed using a balsa spacer (not supplied in the kit) – depending on the dimensions of your servo. The spacer + servo must not be higher than the wing ribs. It may not obstruct the spoiler when closed (do not forget to take into account the double-sided foam tape you will use to secure the servo!). Apply epoxy or medium cyano to the servo spacer (if used) and the entire balsa lower sheeting of the servo bay in order to be sure the double-sided foam tape will stick.
Covering
- Thoroughly sand the surface of all parts with No. 360–400 sandpaper and carefully vacuum all the dust (the iron-on film does not stick well to a dusty surface; the dust also contains hard grains released off the sandpaper capable of ruining the smooth coating of your sealing iron quickly).
- Use as light iron-on film as you can get (KAVAN Covering film, Oracover®, Oralight® etc. – not supplied in the kit). Follow the instruction manual supplied with the covering film of your choice please.
Hinging the control surfaces
Use strips of high-quality clear hinging tape such as 3M Crystal Clear® (available in hobby shops) or strips of the same iron-on film you used for the covering. Remember to apply the tape with the control surface deflected to the limit in order to get free movement of the particular control surface.
Tail surfaces and tail boom installation
- Attach the wing centre section to the fuselage and the horizontal tailplane to the tailplane pylon. Secure them with nylon bolts. Insert the tail boom with the attached horizontal tailplane into the fuselage (no glue yet). Check again that the fuselage is straight. Align the wing and the tailplane with their trailing edges parallel. Once satisfied, epoxy the tail boom and the tailplane pylon in place. Before the glue hardens double check the correct alignment of the wing, fuselage and tailplane.
- Carefully cut the end of the tail boom in order to open the notch for the fin (trim as necessary – beware of cracking the tube). Use medium CA to glue the fin into the tail boom; be sure it is square to the horizontal tailplane.
Pushrod installation
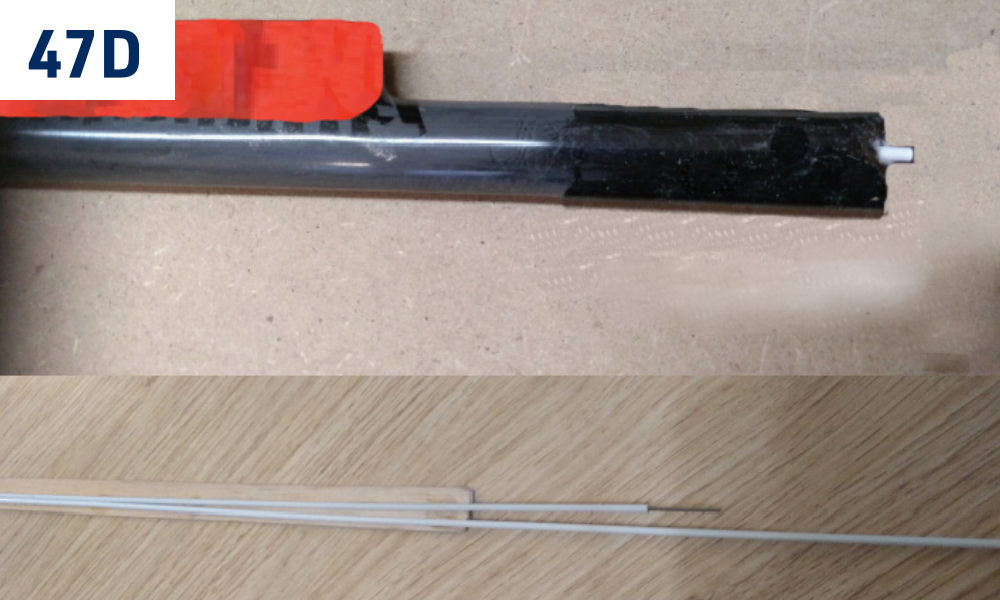
(Fig. 47D)- Tack glue the pushrod tubes to the 1.5 mm balsa pushrod tube holder at five points.
- Apply spots of thick cyano to the balsa and insert the pushrod tubes into the carbon fuselage tube (with a little help from pushrod strings).
- Insert the pushrod strings into the respective tubes from the tail end.
Servo installation
Rudder and elevator servos installation
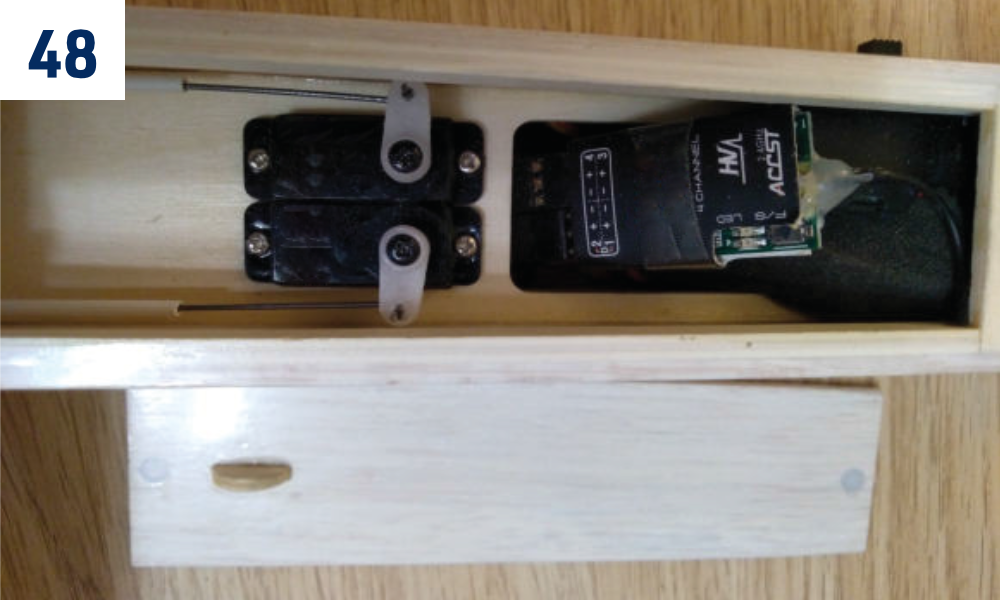
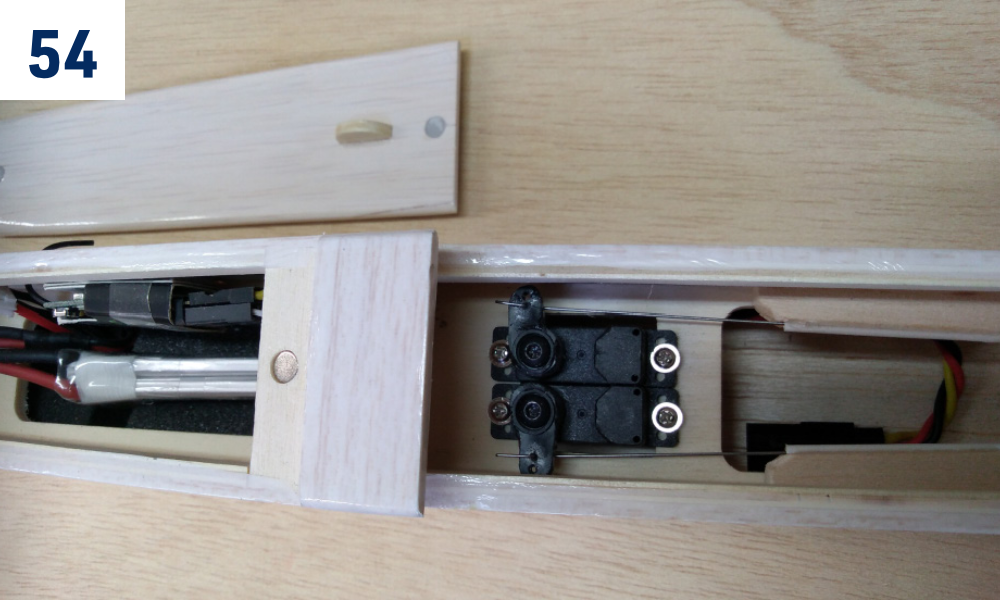
(Fig. 48)- Make a „Z“ bend on the end of the pushrod and fit it to the servo horn.
- Alternatively you can use a closed loop of a Kevlar thread (not supplied in the kit) to hook the rudder – it might save some weight. In that case, you will need to install just one pushrod for the elevator.
Spoiler servo installation
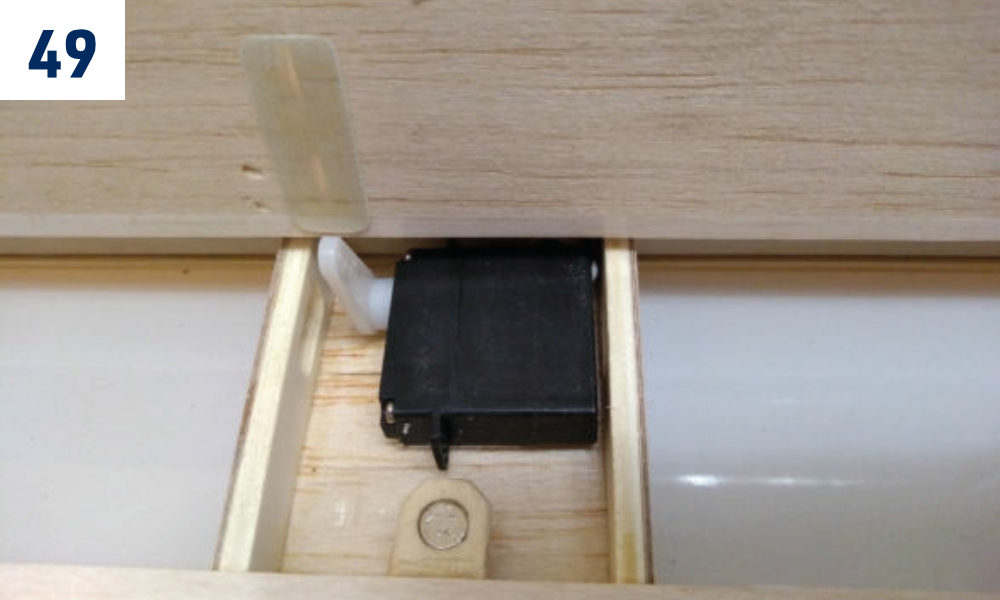
(Fig. 49)- The spoiler servo is to be installed using a balsa spacer (not supplied in the kit). The thickness of the spacer depends on the dimensions of your servo. The spacer + servo must not be higher than the wing ribs (it must not obstruct the spoiler when closed).
- Glue the fibreglass plate to the spoiler.
- Glue the magnets to the spoiler and wing using the supplied liteply holder.
- Please check the polarity of magnets first – they must attract each other.
Pushrods and tow hook
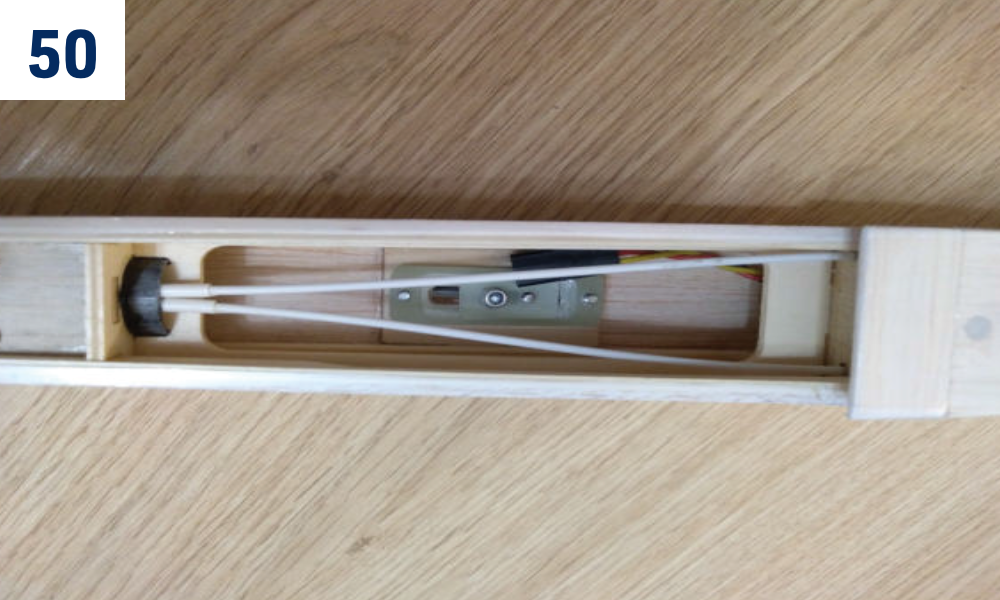
(Fig. 50)- The pushrod tubes are to be located over the liteply plate.
- Thread them through the holes in the former next to the servos.
- Install the tow hook to the pre-drilled holes.
Wing root rib
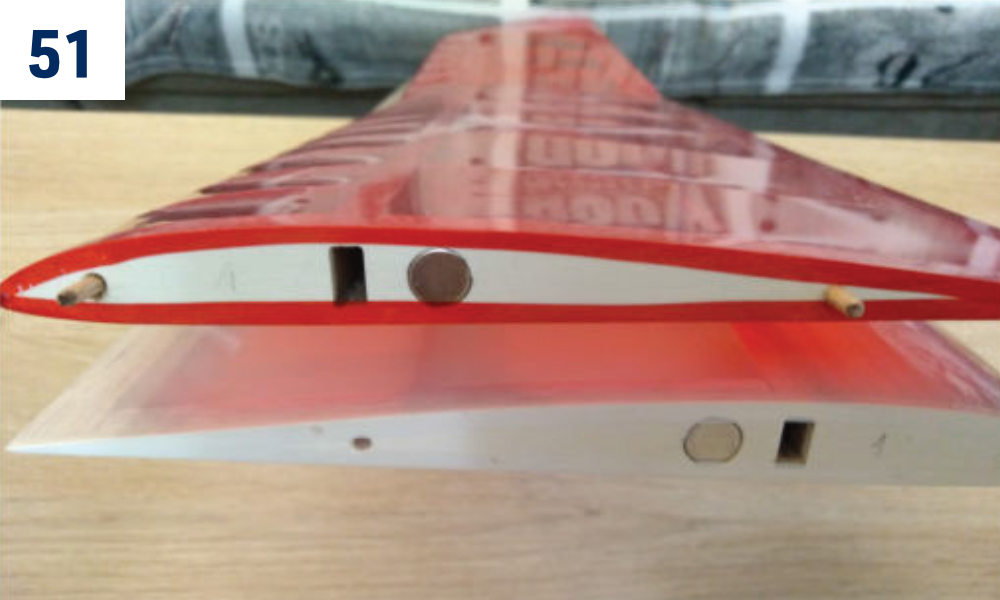
(Fig. 51)- Glue the magnets using 5-minute epoxy.
Pushrod installation – the tail end
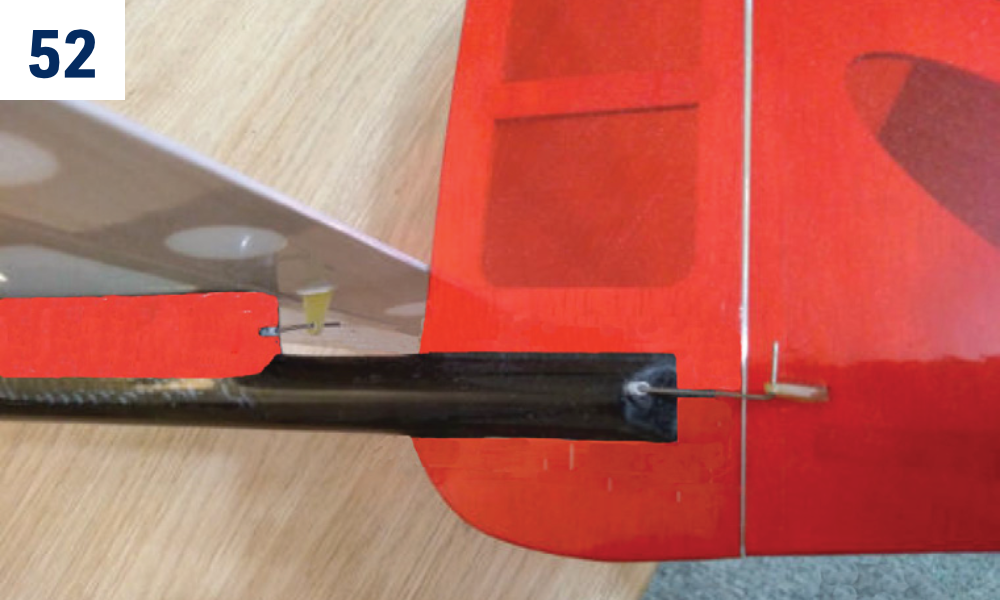
(Fig. 52)- Trial fit the rudder and elevator horns (no glue yet), bend the ends of pushrod strings to the „L“ shape and thread them through the hole in the horn. Once satisfied, glue the horns into the rudder and elevator.
- Please note the servo arms have to be at 90° to the pushrods in the neutral position.
- Glue the end of the rudder pushrod tube to the fuselage.
- The end of the elevator pushrod tube remains free, no glue here.
Towhook – glider version
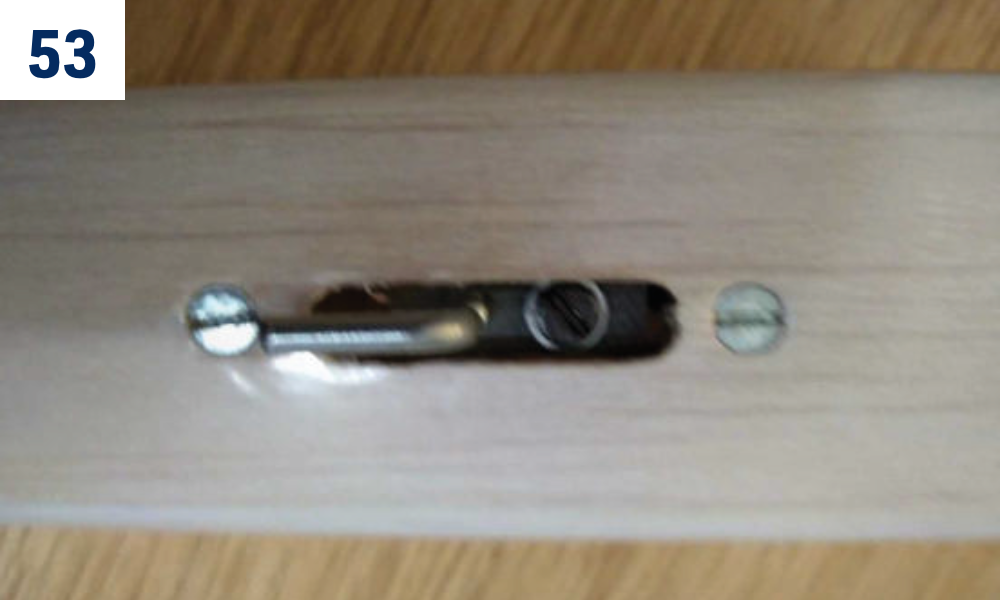
(Fig. 53)- Keep the recommended CG position 78–82 mm behind the wing leading edge.
- Set the tow hook 10 mm in front of the CG for the first flight.
- You have to loosen the front screw in order to move the tow hook.
Power system installation (electric version)
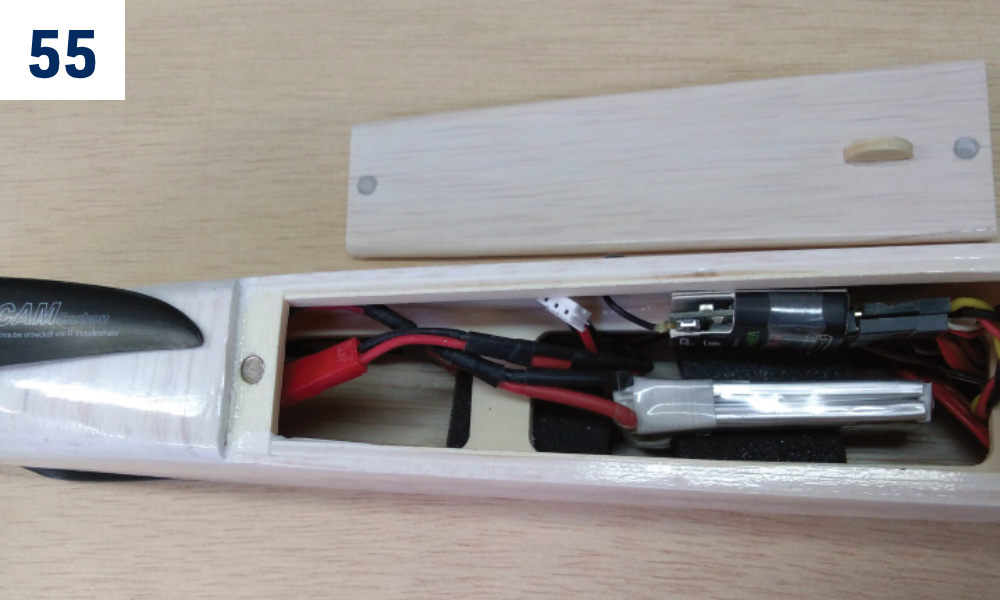
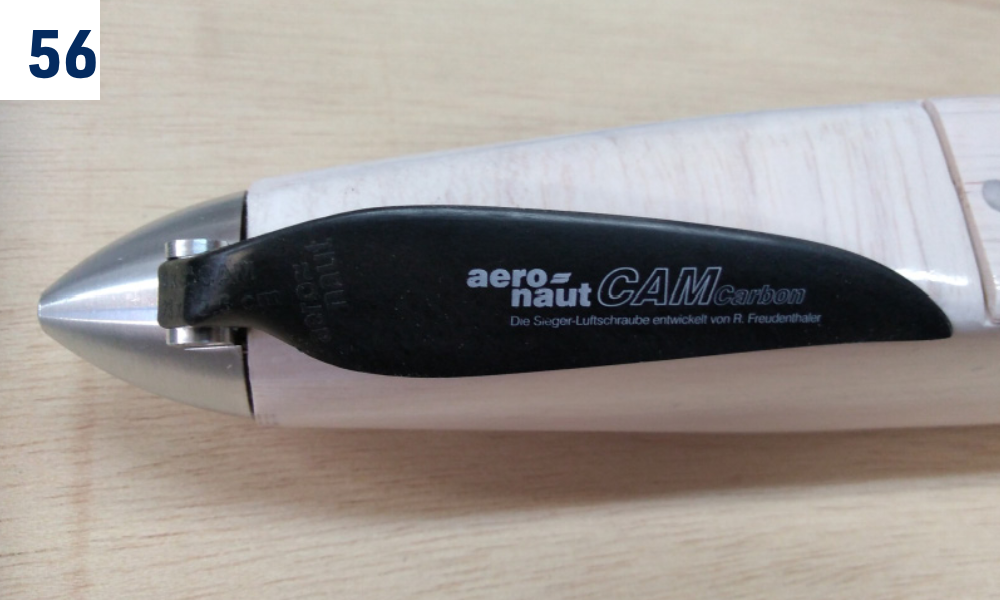
(Fig. 54)+(Fig. 55)+(Fig. 56)
- Fit your motor using appropriate screws to the firewall; secure the ESC and power pack using Velcro tape into the cockpit. With the propeller removed and your RC set on, test whether the motor rotates in the correct direction (counterclockwise when looking from the front). If this is not the case, disconnect the battery, then change the setting of your ESC or swap any two of the three cables between the motor and ESC. Disconnect the battery before fitting a Ø30 or Ø32 mm spinner with blades corresponding to your motor and battery set-up.
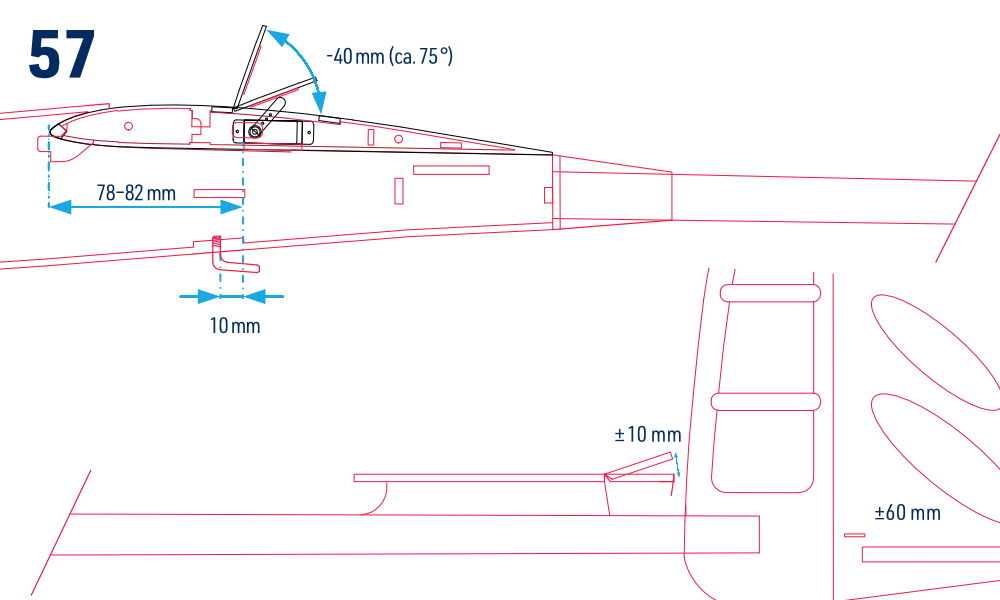
Spoiler
(Fig. 57)- Fibreglass plate 0.8 mm
- The spacer thickness depends on the dimensions of the servo used. The servo must be located as high as possible – as close to the spoiler as possible, without preventing full closure.
- Install the servo using double-sided foam tape.
Pre-flight preparation
Centre of gravity and control throws
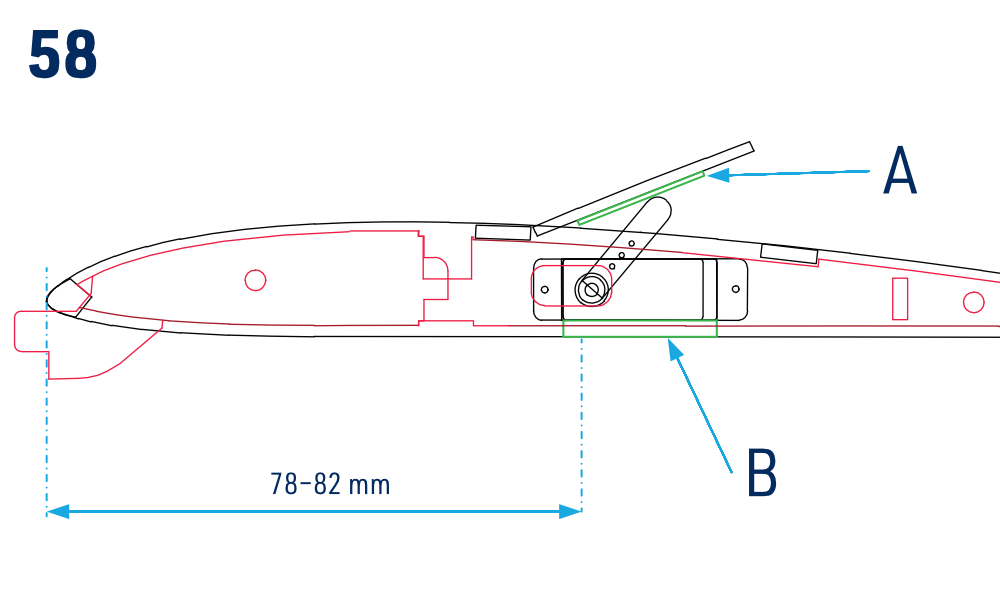
(Fig. 58)| Setting | Value |
|---|---|
| Centre of gravity | 78–82 mm behind the wing leading edge; start at 78 mm |
| Rudder | ±60 mm |
| Elevator | ±10 mm |
| Spoiler | 40 mm opening, approximately 75° upward; labelled −40 mm in the source drawing |
| Spoiler → elevator mix | −5 mm elevator at full spoiler |
Do not move the CG behind 82 mm.
Flying
Be sure you are using fully charged batteries. Now (and before any further flight again) check the correct function of the whole radio equipment and movement of the control surfaces; for the electric version also check the power system. Be sure any part of flight equipment cannot move during flight. We strongly recommend making a range check (see your radio instruction manual for details).
The first flight
Choose calm weather or a light breeze below 3 m/s. Fly only on a safe site such as an RC club flying field. Glider will be very happy on your favourite slope on a calm day. The very light lift will allow perfect fine trimming out.
Glider
Switch your transmitter and then the receiver on and check all the working systems one more. Facing INTO the wind hold your transmitter in one hand; grip the model in the other hand near the centre of gravity. Hold it at head level and give the model a fairly powerful push exactly into the wind; wings level, nose slightly down. An experienced helper may launch the model for you. Your model should now glide in a long, flat and straight path without needing any help from you. Use the controls gently if necessary, and adjust the trim tabs until your Resco glides the above-described way. Now check the position of the control surfaces. Set the length of pushrods to bring back trim tabs on your transmitter to the central position if necessary (do this even if your transmitter stores trim settings). Check again the gliding of your Resco. You can now progress to a towline or bungee launch. The source recommends a 100–150 m towline with a pennant, or a bungee suitable for the model’s wingspan and flying weight.
Electric version
Switch your transmitter and then the receiver on and check all the working systems once again. Launch your Resco into the wind at full throttle with a smooth throw; taking two or three steps can help. Allow it to gain speed before asking it to climb. During climbing be gentle on the controls, and try to keep the model flying into the wind until you have about 100–150 metres of altitude, only where the flying site’s operating limits permit this height. Otherwise remain within the permitted height. Climb slowly – too steep climbing may cause the model to stall and fall to the ground. At a safe permitted height, this is time to trim out your Resco at full power. After everything is OK – it means the model at approx. 30–40 % of full throttle flies straight without turning, descending or ascending (if your Resco already tends to ascend you will need to increase motor downthrust after landing), turn the motor off and test Resco's gliding characteristics.
Keep your Resco into the wind and observe its flight. If it turns without power right (although under power it kept the straight direction) it will be necessary to increase the motor’s right sidethrust after landing and vice versa. If the aircraft descends too much without power (although under power it kept the level flight) you will need to increase motor downthrust after landing (assuming the centre of gravity is correct! – check it after landing).
Final fine-tuning
During the next flights trim out your Resco to find the optimal setting – safe climbing and good gliding – it is a compromise, of course. You might find it useful to program a spoiler → elevator mix (if your radio allows) that will eliminate the nose pitching when the spoiler is deployed. In general, the CG position should be located between 78–82 mm behind the wing leading edge. By moving the CG back you get better gliding performance whilst reducing the stability. It makes your model more sensitive to controls and increases the model's reaction to thermal. The back CG position makes the model more difficult to fly and requires more attention from you, while a nose-heavy model is easier to fly but you will lack the performance. We recommend starting with the CG at 78 mm behind the leading edge. Beyond 82 mm the increasing lack of stability prevails over the gain of gliding performance.
Enjoy your new Resco, have a ball!
Appendix
Assembly illustrations
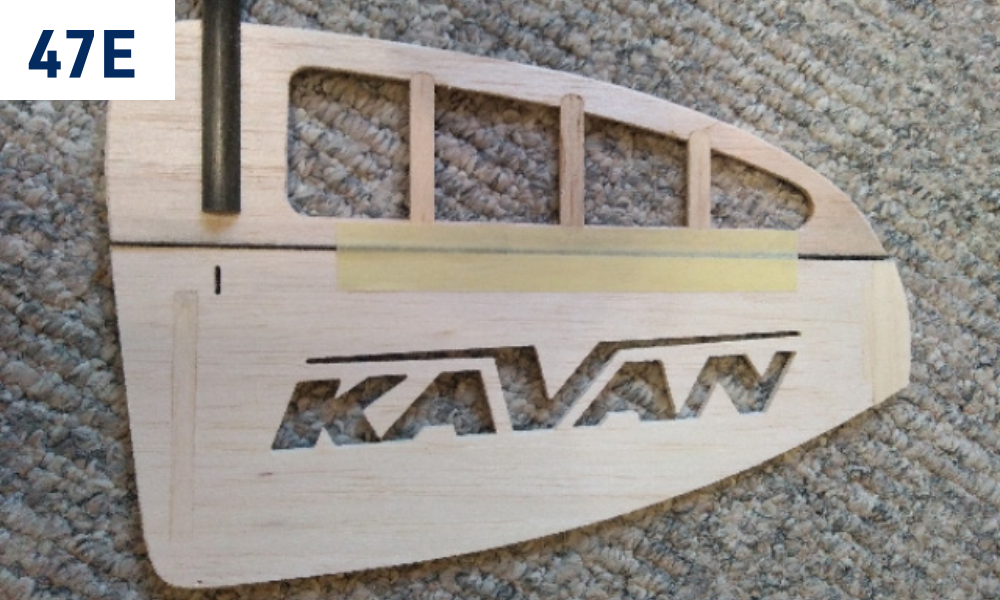
Please note the pictures are just for illustration only – some show our prototype that might differ slightly from the actual, regular series production kits.
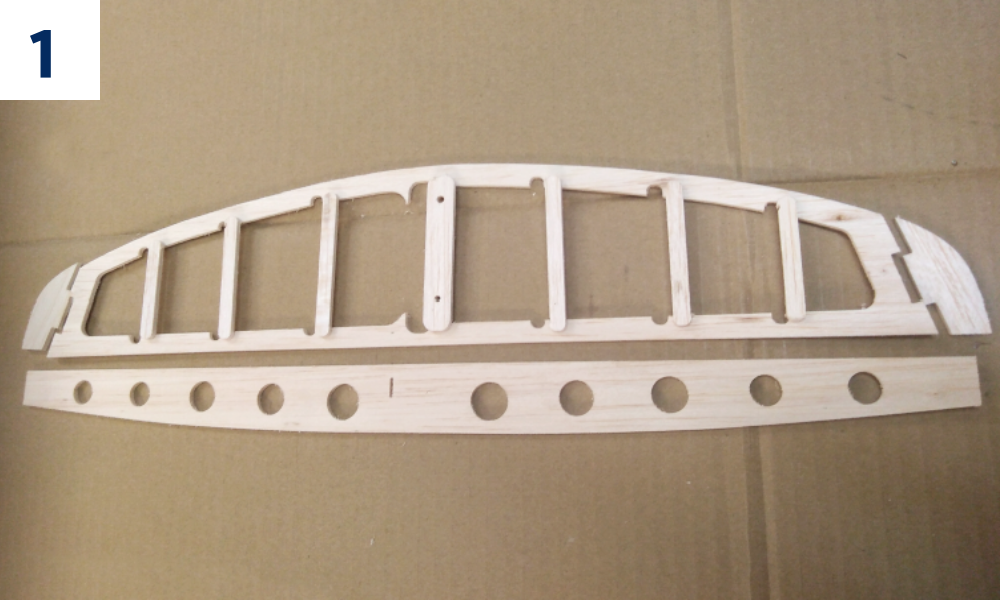
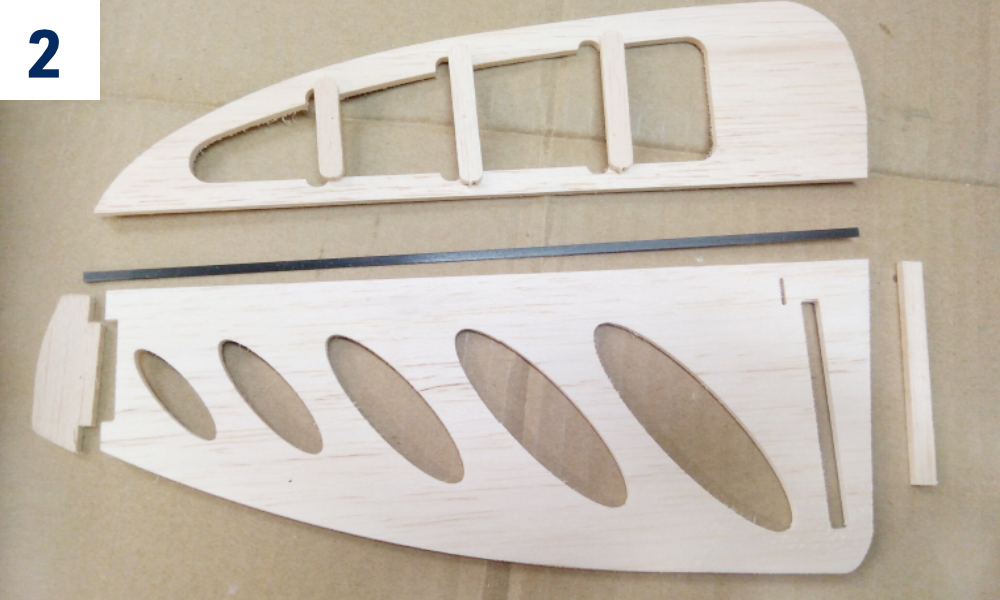
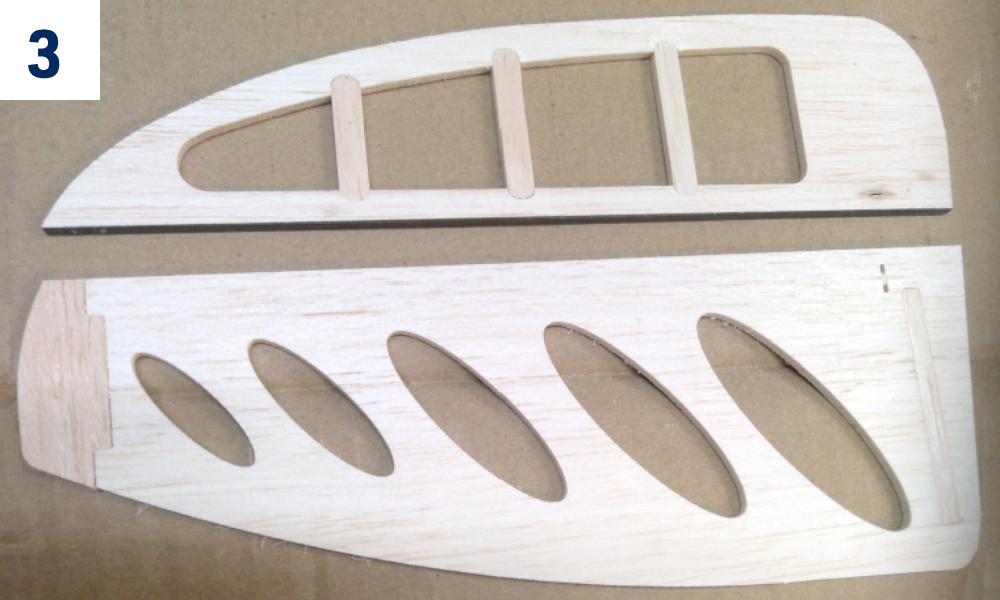
Parts list
Main parts
| Part | Quantity |
|---|---|
| Building plan 1:1 | 1 |
| Instruction manual | 1 |
| Resco sticker | 1 |
| Pushrod set (tube+Ø0.8 mm piano wire) | 2 |
| Carbon tail boom (Ø10 mm) | 1 |
Bag No. 1 – accessories
| Part | Quantity |
|---|---|
| Adjustable tow hook with M3 socket screw | 1 |
| Neodymium magnet Ø3×3 mm | 6 |
| Neodymium magnet Ø10×3 mm | 4 |
| M4 nylon bolt | 3 |
| M3 nylon bolt | 1 |
| M4 blind nut | 2 |
| Fibreglass plate | 1 |
| Control horn | 2 |
| Beech dowel Ø3 mm | 4 |
| Nose shape template (3 mm liteply) | 1 |
| Dihedral jig 7° and 8° | 1 |
| Airbrake magnet holder (3 mm liteply) | 1 |
| Canopy magnet holder (3 mm liteply) | 1 |
| Kevlar thread | 1 |
Bag No. 2
| Part | Quantity |
|---|---|
| Fuselage nose (balsa 8 mm) | 1 |
| Fuselage nose (balsa 10 mm) | 2 |
| Triangle balsa stock large | 4 |
| Triangle balsa stock small | 4 |
| Tow hook plate (1.5 mm plywood) | 1 |
| Wing fixing plate (3 mm plywood) | 1 |
| Fuselage former (3 mm plywood) | 1 |
| Canopy magnet holder (3 mm liteply) | 2 |
| Fuselage former (3 mm liteply) | 3 |
| Tail boom fairing Ring (3 mm liteply) | 1 |
| Fuselage rear ring (3 mm liteply) | 1 |
Bag No. 3 – large parts
| Part | Quantity |
|---|---|
| Wing rib (3 mm liteply) | 6 |
| Wing rib (0.8 mm plywood) | 2 |
| Riblet (0.8 mm plywood) | 8 |
| Wing fixing plate (3 mm plywood) | 1 |
| Wing bolt plate (2 mm plywood) | 1 |
| Wing joiner bay (plywood) | 4 |
| 1.5 mm balsa sheeting | 4 |
| Airbrake reinforcement (2.5 mm balsa) | 5 |
| Carbon wing joiner | 2 |
Bag No. 4 – large parts
| Part | Quantity |
|---|---|
| Fin and rudder parts (balsa 3 mm) | 1 |
| Fin reinforcement (carbon 0.5×3 mm) | 1 |
| Stabilizer and elevator parts (balsa 3 mm) | 1 |
Bag No. 5 – electric version only
| Part | Quantity |
|---|---|
| Fuselage former (3 mm liteply) | 2 |
| Firewall (3 mm plywood) | 1 |
| Nose ring (2 mm plywood) | 1 |
Bag No. 6 – tailplane pylon
| Part | Quantity |
|---|---|
| Tailplane pylon core (3 mm liteply) | 1 |
| Tailplane pylon side (4 mm balsa) | 2 |
| Tailplane fixing nut M4 | 1 |
| Tailplane fixing nut M3 | 1 |
| Tailplane seat (3 mm liteply) | 1 |
| Tailplane pylon jig (3 mm liteply) | 1 |
Wing parts
| Part | Quantity |
|---|---|
| Wing centre section rib set (1.5 mm balsa) | 2 |
| Wing outer panel rib set (1.5 mm balsa) | 2 |
| Wing centre section/outer panel rib set (8 mm balsa) | 1 |
| Wing outer panel/winglet rib set (5 mm balsa) | 1 |
| Trailing edge (5×20 mm balsa) | 3 |
| Leading edge (5×5 mm balsa) | 3 |
| D-Box sheeting (1.5 mm balsa) | 1 |
| Spruce spar 2×8×690 mm | 2 |
| Spruce spar 3×6×690 mm | 1 |
| Main spar shear webbing (5 mm balsa) | 4 |
| Spruce spar 2×8×380 mm | 4 |
| Spruce spar 3×5×380 mm | 2 |
| Balsa spar 2×8×260 mm | 4 |
| Balsa spar 3×5×200 mm | 2 |
| Gusset set (2.5 mm balsa) | 1 |
| Wing tip (3 mm balsa) | 2 |
| Pushrod tube holder (1.5 mm balsa) | 1 |
Fuselage parts
| Part | Quantity |
|---|---|
| Fuselage side (2.5 mm balsa) | 2 |
| Fuselage lower sheeting (2.5 mm balsa) | 1 |
| Fuselage upper sheeting + canopy (2.5 mm balsa) | 4 |
| Tail boom fairing upper sheet | 1 |
| Fuselage side reinforcement (3 mm liteply) | 4 |
| Fuselage former (servo tray) (3 mm liteply) | 1 |