Joysway Magic Vee V6 / Magic Cat V6 - Instruction manual
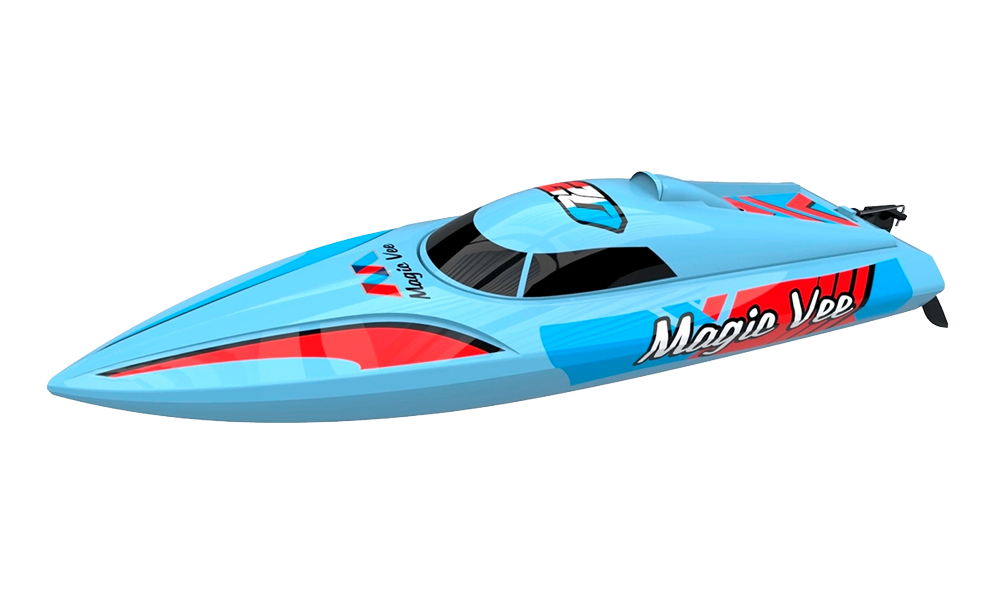
Magic Vee V6
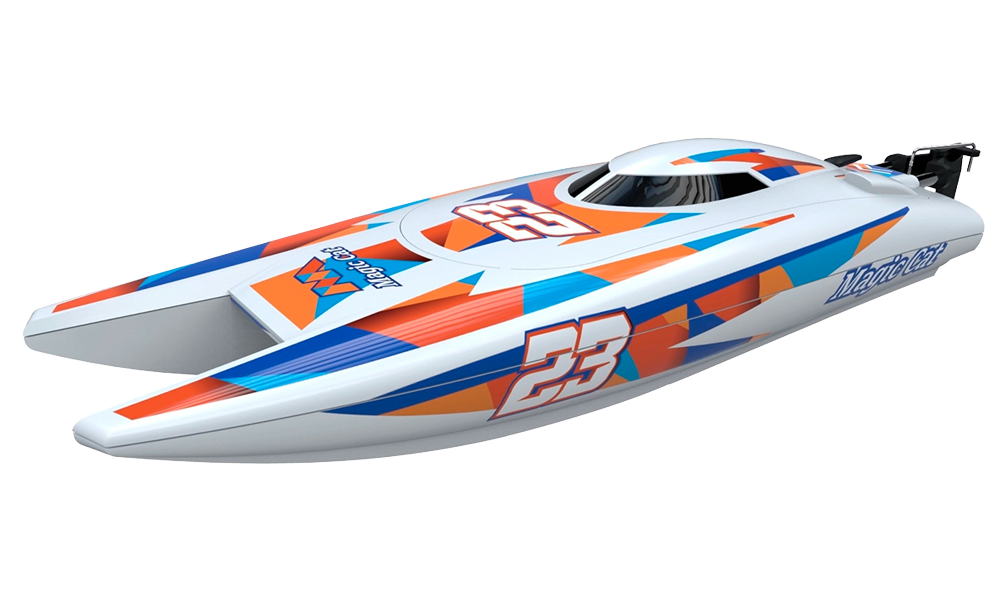
Magic Cat V6
Introduction
This ready-to-run electric boat has proportional steering and throttle control, a water-cooled brushed motor and a rudder servo. Read the complete instructions before installing the battery. The tables below identify the specific version covered by this manual.
Safety notes
This is not a toy. Users under 14 require close adult supervision. Keep fingers, clothing and tools away from the propeller and all moving parts whenever the battery is connected. Disconnect the battery before maintenance.
Use this model only in fresh water, in an open area away from swimmers, people, animals and aquatic plants. Do not operate in confined water, rain or thunderstorms. If lightning or thunder occurs, stop operating and disconnect the model safely.
Never enter deep water or a strong current to retrieve a model. If control is lost, first raise the transmitter to try to restore the link. Use a safe recovery method from shore; do not put yourself or anyone else at risk.
Keep the transmitter dry; it is not water-resistant. Radio range depends on the surroundings and battery condition. Keep the boat within clear sight and a safe return distance. Do not run aground, use strong currents or large waves, or overload the motor by driving through weeds or other obstructions.
Specifications
| Parameter | Magic Vee V6 | Magic Cat V6 |
|---|---|---|
| Hull / overall length | 225 / 270 mm | 220 / 265 mm |
| Beam | 70 mm | 72 mm |
| RTR weight | 177 g | 172 g |
| Water-cooled brushed motor | 180 | 180 |
| Receiver/ESC unit | 5 A | 5 A |
| Drive battery | 6.4 V 320 mAh LiFePO₄ | 6.4 V 320 mAh LiFePO₄ |
| Manufacturer-stated maximum speed | 20 km/h | 20 km/h |
| Approximate running time | 8 min | 8 min |
Set contents and equipment
The set includes the assembled boat, J2C96 2.4GHz transmitter, drive battery and matching USB balance charger, boat stand, 4 AA transmitter batteries, and a triangular transmitter hanger with 3 screws. A cross-head screwdriver is required but not included.
Also included: a spare silicone drive coupling and, for Magic Vee, a hex key for the turn fins.
Main section
Preparing the transmitter
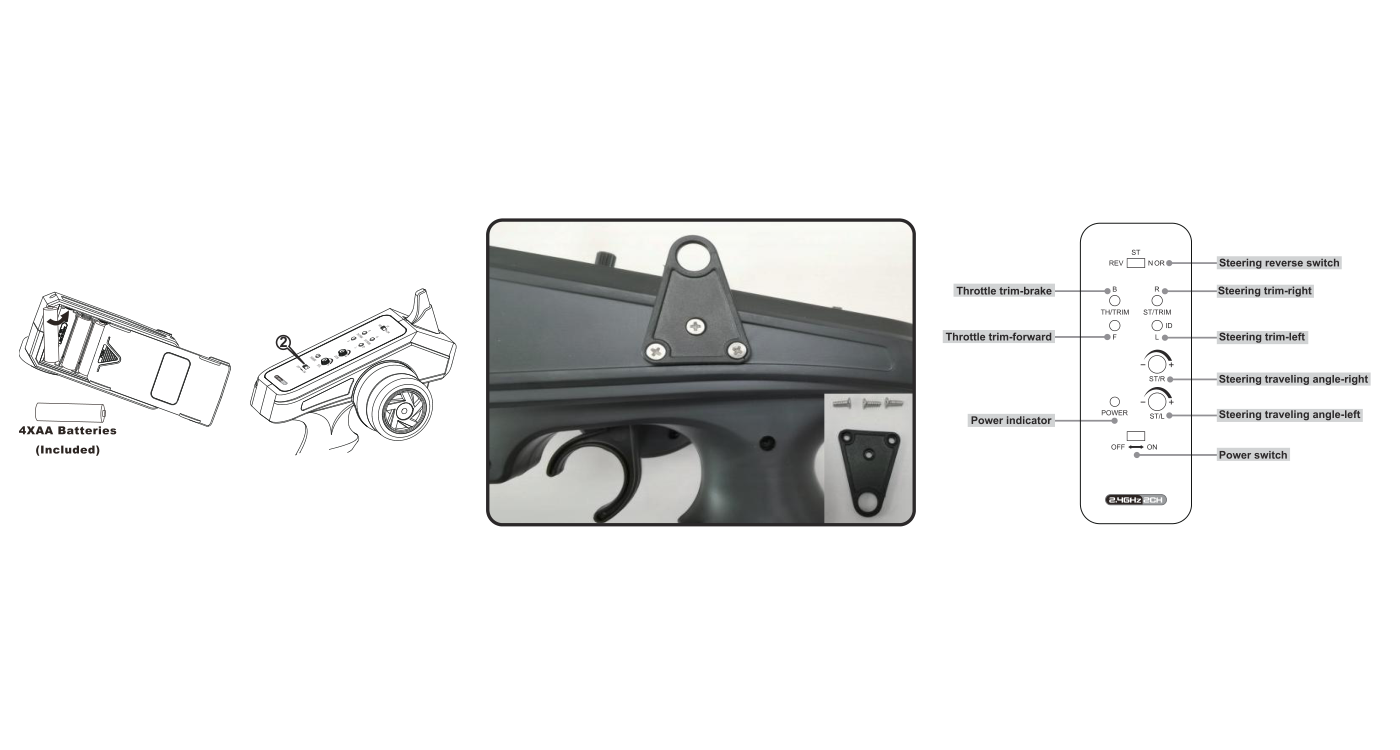
- Open the battery compartment and install 4 fresh AA cells with the polarity shown in the tray. Close the cover.
- If using a neck strap, fit the triangular hanger with the 3 supplied screws and attach a suitable strap.
Charging the drive battery
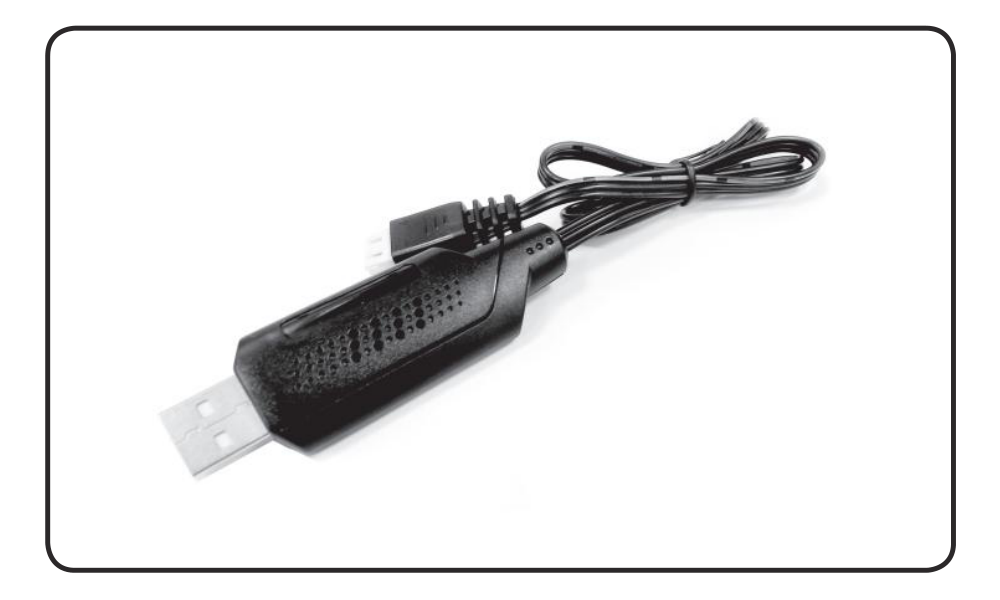
Charge outside the model under adult supervision, on a nonflammable surface. Do not leave charging unattended. Use only the correct charger for the battery chemistry and cell count. Never short-circuit, dismantle, crush or burn a battery. Stop using a damaged, swollen or abnormally hot pack. Disconnect it after use and recycle exhausted batteries appropriately.
- Use the supplied 6.4V LiFePO₄ USB balance charger. Connect it to a suitable USB supply, such as a computer, USB adapter or power bank. Its LED lights continuously.
- Connect the pack’s charging plug to the charger. The LED goes out during charging. A discharged pack takes about 3 hours; the pack must be fully charged before its first use.
- When the LED lights continuously again, charging is complete. Disconnect the pack and then the charger.
Installing the battery and closing the hatch
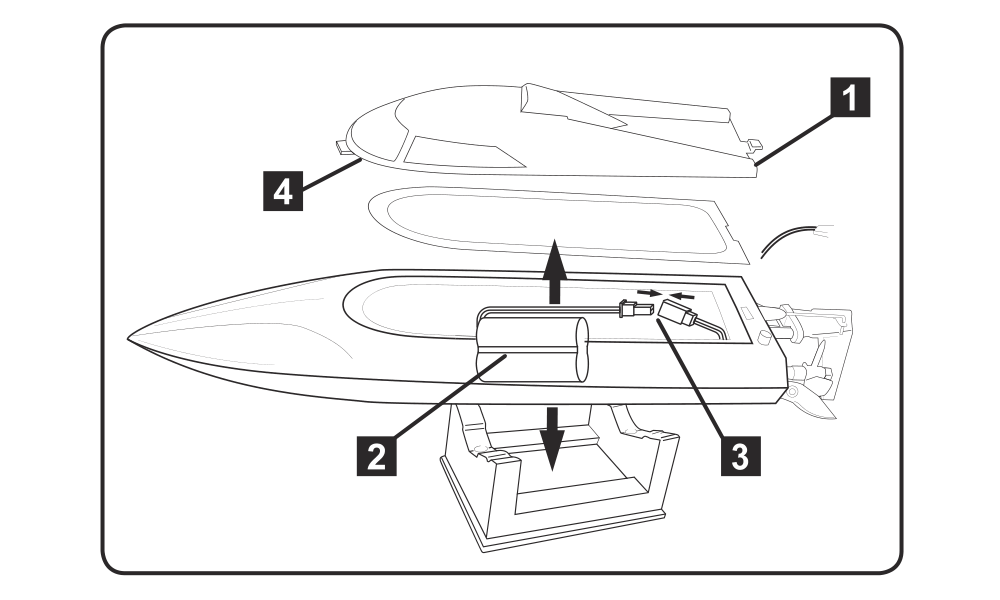
- With the battery disconnected, place the boat on its stand. Carefully release the catch at the rear and lift off the upper deck. Place the charged pack on the left side of the hull.
- Inspect the cooling hoses and the water inlet under the hull. They must be clear, securely connected and undamaged; a distorted inlet or blocked hose can overheat and damage the motor and ESC.
- Switch the transmitter ON before connecting the pack to the ESC. Keep the trigger at neutral and the propeller clear. Join the matching connectors without force and with correct polarity.
- Check that the rubber sealing ring is seated correctly in its groove. Refit and lock the hatch without trapping the seal or wires.
Automatic binding
- Keep other transmitters and receivers nearby switched off during binding. No bind button is required.
- Switch on the transmitter: it beeps once and its power LED flashes. Connect the boat battery: the transmitter beeps twice and the LED becomes steady when binding succeeds.
Checking direction, trims and travel
- With the boat supported and the propeller clear, turn the steering wheel right. The rudder’s trailing edge must move right; a left command must move it left. Correct a reversed response with ST REV/NOR, then recheck.
- Use ST/TRIM R/L to centre the rudder. Fine-adjust it on the water so the boat runs straight with the wheel centred.
- Set TH/TRIM B/F so the propeller stops with the trigger released. Briefly pull the trigger to check motor response; keep this dry check short because water cooling is not operating.
- Adjust right and left steering limits separately with ST/R and ST/L. Each knob covers 0–100 %: fully left is 0 %, fully right is 100 %. Start with the factory settings and reduce travel if needed; the servo must not force the linkage against a stop.
Turn fins and self-righting
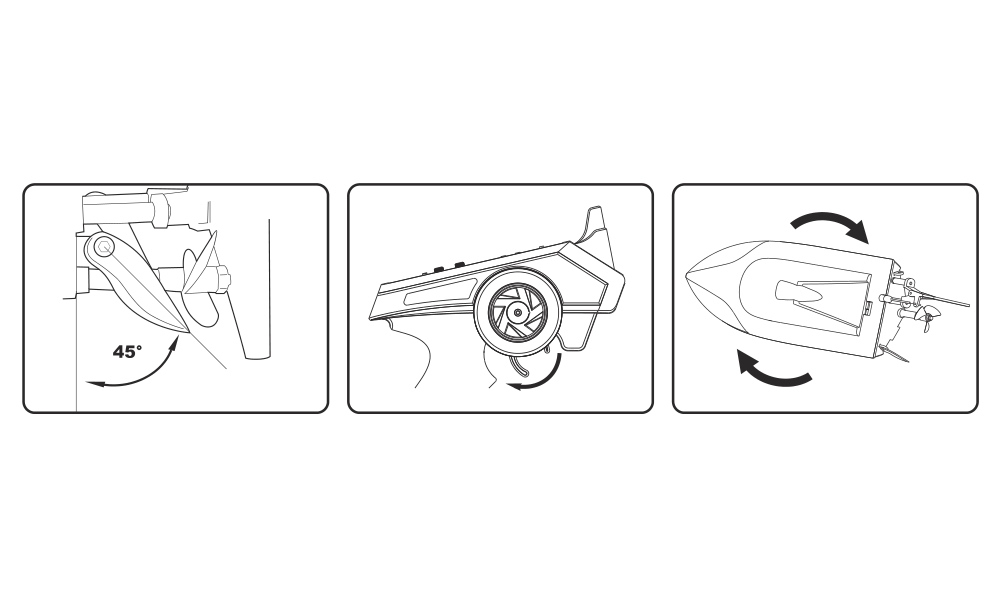
On Magic Vee V6, set the turn fins to approximately 45° relative to the hull using the supplied hex key. This deep-V model has a self-righting function: if it capsizes, pull the throttle trigger to turn it upright. This instruction does not apply to Magic Cat V6; the shared manual does not give that catamaran a self-righting function.
Launching and returning to shore
- Before every run, check charge, cooling tubes, hatch seal, correct steering, neutral throttle and free movement of the drive. Switch on the transmitter first, connect the boat second and complete the control checks before placing it in the water.
- Start near shore and increase speed gradually. Keep enough battery capacity for the return. The quoted 8min running time varies with conditions and throttle use.
- Return immediately if the boat slows markedly. This can indicate the ESC’s low-voltage protection; continuing to run can overdischarge the pack and cause irreversible damage. If the boat starts bobbing unusually, return, disconnect the battery and drain any water from the hull.
After each run
- Disconnect the boat battery first, then switch the transmitter OFF. Remove the battery from the boat and the cells from the transmitter when finished.
- Remove the upper deck and let the hull dry completely in a warm, dry, ventilated place before storage. Do not seal residual moisture inside.
Allow the motor to cool for approximately 5–10 min before installing another charged pack. Continuous running overheats the drive and shortens motor life.
Lubricating the drive shaft
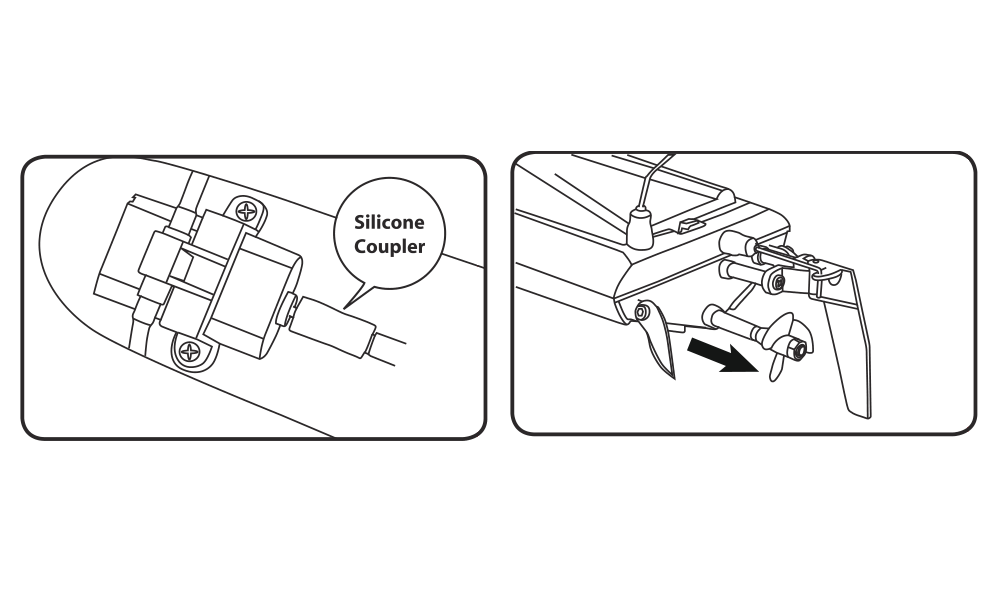
After every 2–3 outings, remove and grease the flexible drive shaft and propeller shaft with waterproof marine grease. Lubrication limits wear and also helps seal the shaft tube against water ingress. Disconnect the battery before starting.
- Hold the silicone coupling firmly with one hand and withdraw the flexible shaft and propeller shaft from the tube with the other.
- Apply grease and refit in reverse order. Push the shaft end fully into the silicone coupling so the drive is secure.
- Repeated shaft removal can loosen or stretch the silicone coupling. Replace it with the supplied spare if it no longer grips securely.
Appendix
Troubleshooting
| Symptom | Checks and remedy |
|---|---|
| Boat does not move | Fit missing batteries, correct their polarity, replace weak transmitter cells and charge the drive pack. Confirm binding and check that the shaft is not jammed. |
| No control or short range | Replace weak transmitter cells, check the boat battery and repeat binding away from other active sets. Move closer safely; do not continue operating with unreliable control. |
Spare parts
| Part no. | Description |
|---|---|
| 81002 | 180 motor – Vee/Cat |
| 81003 | Flexible shaft – Vee/Cat |
| 81005 | Rudder and turn fins – Magic Vee |
| 81009 | Rudder set – Magic Cat |
| 810602 | Rubber shaft couplings, 2 pcs |
| 810606 | 6.4 V 320 mAh LiFePO₄ |
| 810607 | 6.4V USB balance charger |
| 810608 | J2C96 2.4GHz 2-channel transmitter |
| 810609 | ESC/receiver/servo assembly – Magic Vee V6 |
| 810610 | Hatch and rubber seal – Magic Vee V6 |
| 810611 | Two-blade propellers, 2 pcs – Magic Vee V6 / Cat V6 |
| 810803 | Hatch and rubber seal – Magic Cat V6 |
| 810804 | ESC/receiver/servo assembly – Magic Cat V6 |
Recycling (European Union)
Electrical equipment bearing the crossed-out bin symbol must not be disposed of in normal household waste. Instead, it must be taken to a specialised collection and recycling facility. In EU (European Union) countries, electrical equipment must not be disposed of in normal household waste (WEEE - Waste of Electrical and Electronic Equipment, Directive 2012/19/EU). You can take unwanted equipment to your nearest collection or recycling centre. The equipment will then be disposed of or recycled safely, free of charge. By handing in your unwanted equipment, you can make an important contribution to protecting the environment.
EU Declaration of Conformity
Joysway Hobby International Ltd. hereby declares that the model Magic Vee V6 / Magic Cat V6 and other equipment supplied with it are in compliance with Directive 2014/53/EU. The full text of the EU Declaration of Conformity is available at the following website: https://www.kavanrc.com/doc. This 2.4 GHz radio equipment can be used without prior registration or individual approval in all countries of the European Union.
Warranty and post-warranty service
All Joysway products are covered by a 2-year warranty covering all manufacturing defects and faults. When making a claim within the warranty period, please always present a copy of the proof of purchase with the product and provide the service personnel with as detailed and complete information as possible about the defect found, your usage and other information that will facilitate the assessment of the claim and speed up its settlement. Please make your claim at the shop where you purchased the product.
This warranty certificate entitles you to a free warranty repair of the product supplied by KAVAN Europe s.r.o. within a period of 24 months. The warranty does not cover natural wear and tear due to normal use, as this is a product for modelling use, where the individual parts operate under much higher loads than normal toys are subjected to.
The warranty also does not cover any part of the equipment that has been improperly installed, roughly or improperly handled, or damaged in an accident, or any part of the equipment that has been repaired or altered by an unauthorised person (this includes the application of any waterproof sprays/coatings by the user). Like other fine electronics products, do not expose this equipment to high temperatures, low temperatures, moisture, dusty environments, violent mechanical shocks and impacts. Do not leave it in direct sunlight for extended periods of time.
Improper installation includes inadequate mounting, mechanical strain on cables and insufficient cooling.
Please claim warranty repairs from the shop where you purchased the product.
If possible, use the original packaging when returning the product for service. Include a dated description of its use and the fault, together with your full address and telephone number.